Wednesday, October 19, 2011

Isomalt Orchids


The tools I used for the isomalt orchid were the orchid mold, powdered color (I used black magic from ECG), clear isomalt stick from Cake Play, silicone cupcake liner from Wilton.
Put the isomalt stick into the silicone cup.  Microwave in 15-20 second increments until all melted.

Once melted be very careful and pinch the silicone cup - be gentle and cautious so that you do not spill the hot isomalt on your fingers.  Pour a stream into the mold cavity until about 90% full.


Next sprinkle a little of the color onto the rest of the isomalt.  You may stir slightly if you want to get it mixed in a little more.


Pour the color over the back of the isomalt.  If you want the colors to meld more make sure the clear is still warm.


Once the isomalt sets and is barely warm to the touch, lift the mold and gently pull the silicone away from the isomalt.


Pull the isomalt out of the mold.


Below are two differnt orchids made with the same mold.  The left orchid had less color used on the second layer and was left flat when pulled from the mold.  The right orchid was gently shaped when removed to cup the petals.


Mold used:
Orchid Carved

Friday, September 2, 2011

New Applique Lace Molds

The next project is a wonderfully detailed tutorial by Sherrie Ortiz showing some of the new lace molds -- Thank you SO MUCH Sherrie for this project!  

I started out with this 4 tier cake blank because I was redoing my dummies.


These are the molds I was using. There are 3 shown but I just used the two with the same pattern in the end.


First step is the design process. Deciding what goes where. The flexible molds are nice for this because you can fold them to into the areas to see just how it would look. As you can see I was undecided. It’s all part of the process.


HOW to use the molds: 


I really liked these molds. They are very easy to use. Gum paste or fondant is fine depending on what you want to do with them. I think they would make pretty cupcake toppers too. I first marked them with a sharpie to show where the patterns match up. 


This makes the process much easier.

Next roll out the fondant fairly thin but not so much you can see through it. Too thin and the lace will tear when you pick it up. #1 on a Kitchen aid roller if you have one. 


Place the fondant on top of the lace base (the bigger part) and then press with your hand enough to see some of the impression.


Now add the TOP of the mold matching the marker spots and press firmly till you see the edges of the fondant “break away”


Pull the fondant all the way off and take the TOP of the mold off. Use your finger to push any excess or rough edges into the mold. If you have a tear you could try to patch it at this time if you want.


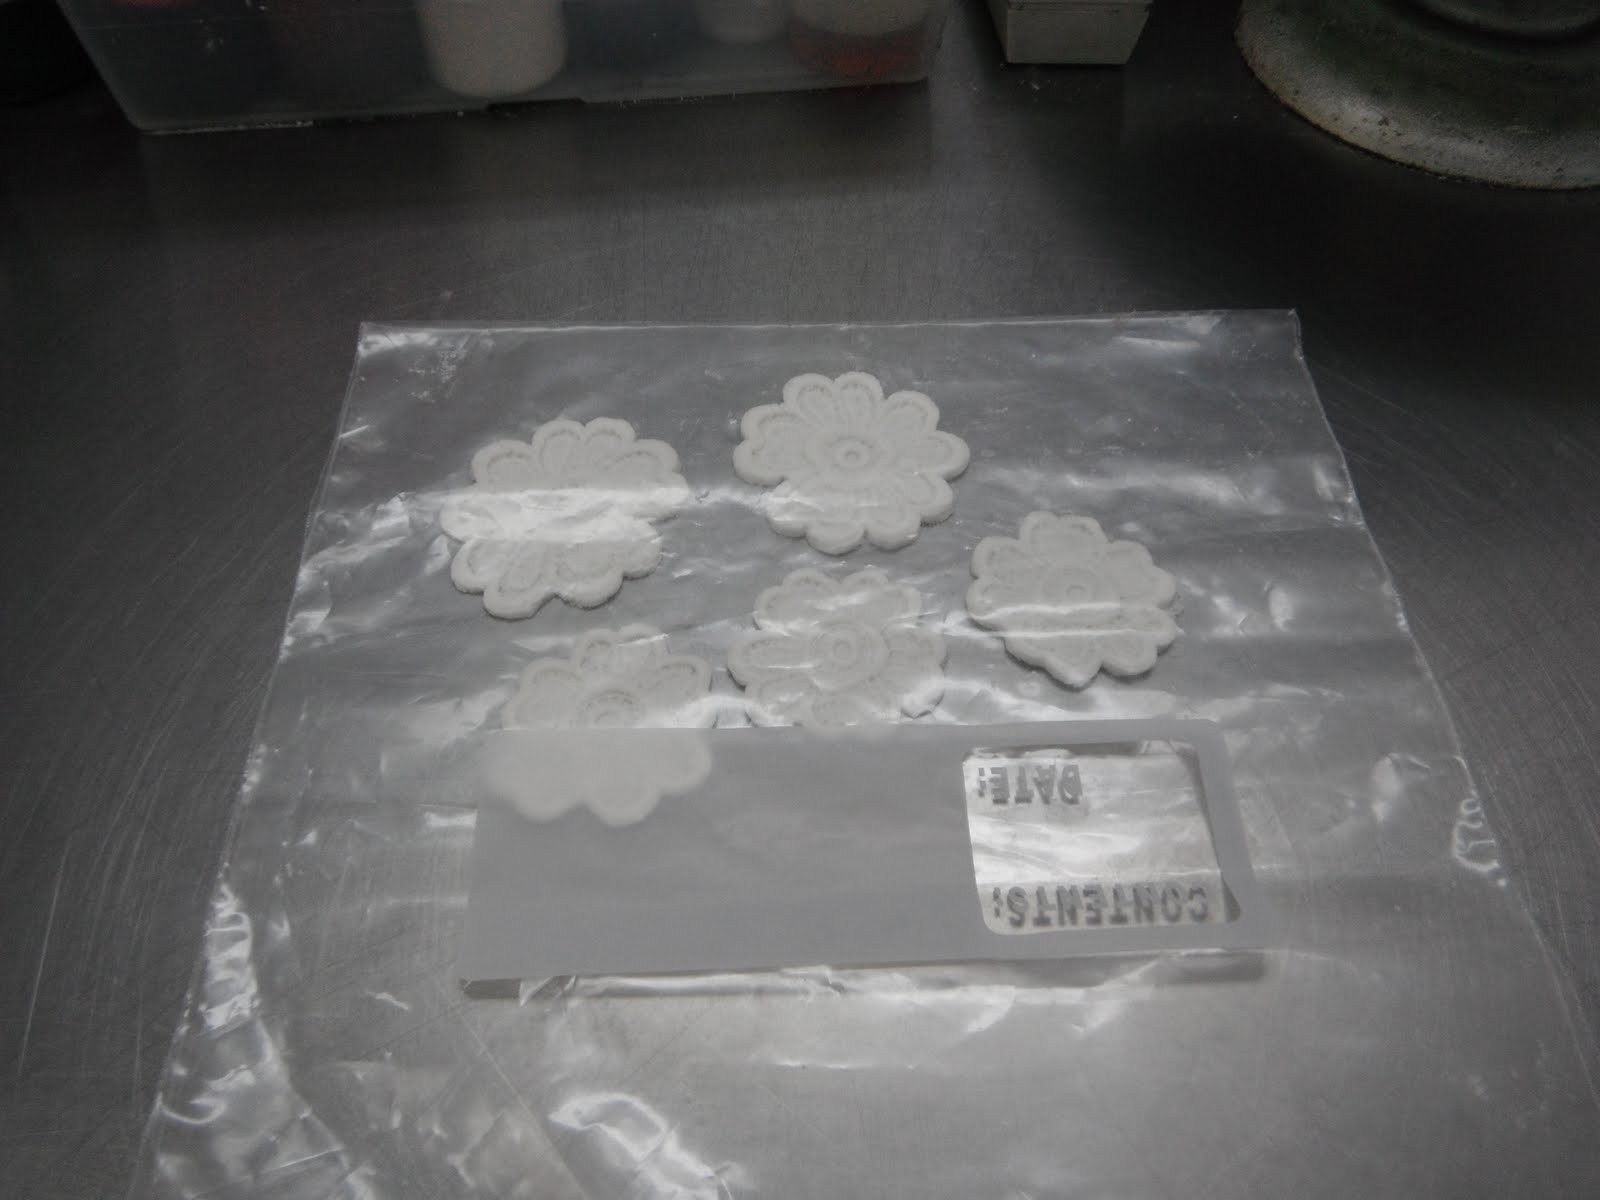
 If you need a lot of these you can store them under a plastic flap so you can stream line your work. If they need to sit for a longer amount of time I will lay a damp towel OVER the PLASTIC to help hold in moisture.  I actually cut out all these parts and had dinner before I came back to finish the cake. I have done this as much as 24 hours ahead of time. Still just as fresh.


So I was mixing up different ideas for placement and nothing was working for me. I was thinking about piping something below the lace or add accents of something but I was not really in the right frame of mind. So I scratched that idea and went a totally different direction with swags. Here is a tip if you have a hard time visualizing where a  swag should go. I use red floss and pins to hang the string so I can see better.


 Bad idea. Just not right.
So getting to the point. I used a simple texture pin on the fondant that was rolled out to a 1 on the kitchen aid (not too thin) then I used the lace parts to accent the corners as shown.


I did use little balls of fondant to bump up the molds if the placement seemed too flat.


I finished it off with ribbon that had the same impression on it as the drapes and fondant pearls.


TaDAAAA!!!!!! Thanks for watching. Hope you enjoyed the show.

~~~~~~~~~~~~~~~~~~~~~~~~~~~~~~~~~~~~~~~~~~~~~~~~~

To see more work by Sherrie check out her website:  Sherrie's Cake Magic

Lace Molds Used:


Tuesday, July 26, 2011

Safari Babies!

Go on safari with Ruth Rickey and this wonderful collection of safari babies created by Ruth using our baby face pair!  If you are lucky in the next year you can learn to make these wonderful figures in class with Ruth.  She is now scheduling up coming classes so check out her website listed below.  You may also contact her about setting up a class in your area.


Make sure you keep an eye on her website for details regarding up coming classes on making these wonderful babies!

Contact Ruth

Product Used:
Baby Face Pair

Wednesday, July 20, 2011

Christmas in July!


Don't forget the
Christmas in July Sale!
The store will be closed July 21st-24th to get ready.
Make sure to visit the site over the next few days to see what is NEW. We will be adding several new items prior to the sale.


To thank everyone for being patient during this transition time at Decorate the Cake we have been in negotiations with Santa to provide some wonderful deals to our loyal customers. The Sale will take place on Monday, July 25, 2011. In preparation for the sale we will be closing from July 21-24 so the elves can get the store in order for the big day.
There will be several new molds up on the site in time for the event -- make sure you check it all out!
Here's the skinny on the details: 
Monday July 25th
40% off Total Order
Free Shipping for Orders over 150.00
Coupon Code: Xmas2011
-- To ensure you type the code properly I suggest you copy and paste the code.
And the restrictions:
Offer good for orders placed on July 25, 2011 with coupon code, not valid with any other offer discount code, deal or coupons - May not be combined with reseller discount.
For Free Shipping order totals must be 150.00
Please NOTE:
Due to the volume of orders processed during these sales events, please allow up 3 to 4 weeks for order processing. In most cases we can get the smaller orders out within a few days, but for larger order they will take longer -- remember we hand pour every mold we sell..
DTC will be closed July 21st-24th in preparation of the sale , so plan ahead for this summer decorating season.

Friday, May 27, 2011

Harp with Cherubs and Roses

Beautiful!  Check out the latest DTCPUG Project.

When I saw these molds I thought that the harp looked so like a Michelangelo sculpture, I tried to get that effect by using chocolate and candy melts which are opaque instead of using poured sugar.  The result does in fact look like a statue and would make a great stand alone candy piece, or be lovely atop a wedding cake or valentine. 

To make these candy molds, you can use either candy melts, or almond bark or melting chocolate.  I feel like it is more economical to use almond bark when color is not necessary.   You will also need a decorator piping bag for each color you plan to use.  Depending on the temperature in your kitchen and how fast you work, you may also like to use a heated work surface.  I use a heating pad under a cookie sheet when my candy is setting too quickly.  I also like to work with multiple molds and colors at the same time. If multi-tasking is not your thing, you can plan your layers of color and work one color at a time.  

Put your candy melts or chopped up almond bark into the decorators bags.  Melt in the microwave at 30 second intervals one bag at a time. Be sure to check for hot spots, mash the bags around to mix, and towards the end I often drop down to 15 second intervals to ensure that I don't burn the candy or melt the plastic. Depending on how fast you work and the temperature in your work space you might need to experiment with out long you melt your candy. 


Once the candy is melted, snip the tip of the bag.  For very fine detailed work, go about 1/8th of an inch.  For larger areas, you can go a bit bigger. 


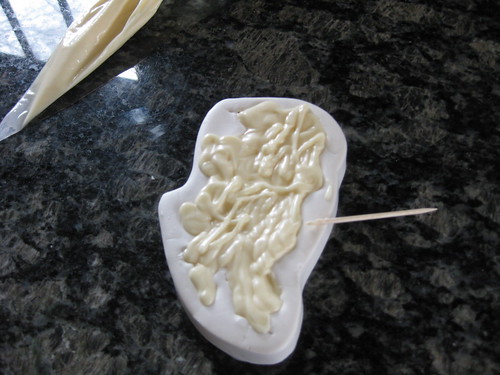
For solid areas of color, you can use the tip of your bag to get down into the details and fill in as you go. The neater you are when you fill now, the less clean up you will have to do at the end.  After you have filled the mold, take a toothpick and use it to stir and smooth the candy and clean up the edges of the mold.  If you have no colored details, you can also use the toothpick to ensure the candy has gotten into all the corners of the mold. 


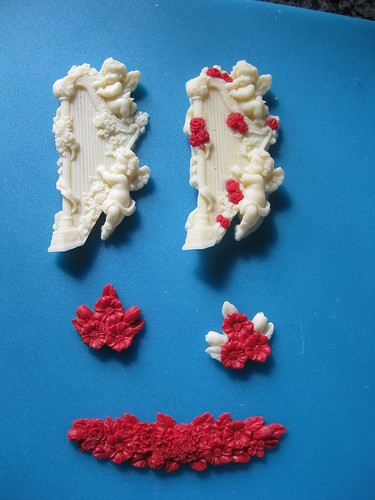
If you would like to add colored details, you must do that before you fill in the main color.  Here, I piped in the roses and let them set prior to adding the white. 


This particular mold has many fine details, so it was important to have very warm melted candy and a fine tip to get into the little corners.   I sometimes have a hard time seeing what the details will be from reversed image you get looking at just the mold, so before I choose to add color I like to create a solid candy in the mold and look for things like flowers or ribbons that I want to have in color.  If you hate the solid one, you can always re-melt the candy and use it again.  Be careful when you re-melt the candy melts or chocolates.  They do not always melt as slowly the second time, and if you try to re-melt them too many times they do get a bit funky. You can some times get uneven color or spotting or a bit of a frosted white look to your end piece as the repeated melting affects the tempering of chocolate. 

Once the detail colors have set, fill in with your back ground color.  This time as you smooth with your toothpick, be aware that if you stir too deeply you can end up mixing in your contrast color.  This is a nice effect if you are going for marble or swirls, but if you want crisp edges you should avoid poking down too deep. 


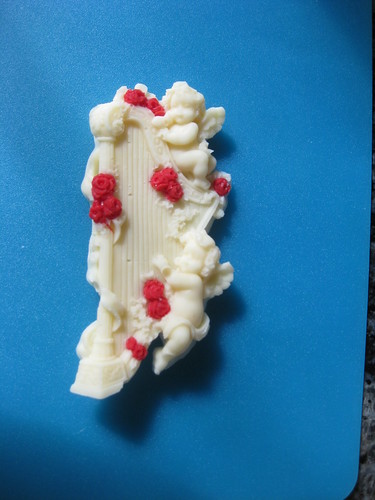
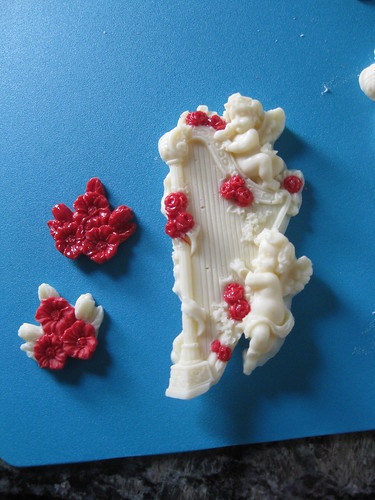
Now, wait for your candy to set. If you are impatient you can put them in the freezer to speed up the process. When I remove the molds, I loosen all around the edges before I pop out the entire piece.  DTC molds are extremely flexible, even out of the freezer. Here is a close up of the harp with red roses. 


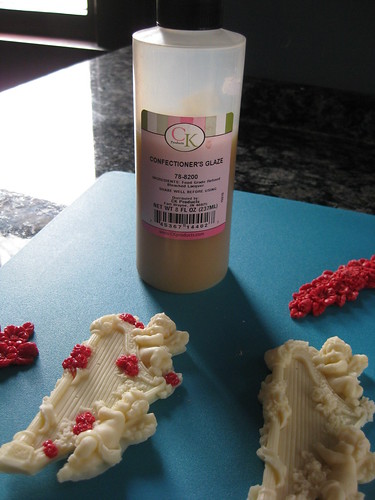
If this is a show piece and you really want to make it pop, brushing on a dab of Confectioners Glaze will make your candy very shiny.  I used it on only the roses to add to the contrast.  


In this image you can see, the solid red flowers are glazed, and the ones with contrasting white buds are not. You can also see how the roses on the harp stand out, making the matte white look more like marble or an ivory statue.  It is a very nice finishing effect. 


Product Used:

Wednesday, May 25, 2011

Mystery project- Shoe #3 and Carved Rose

Another DTCPUG Project!

These are two beautiful molds that I decided to use with melted candy. The shoe has wonderful detail in the decoration and would look fantastic with any other edible material as well. The carved rose mold is very delicate in the center and I would be afraid it would lose some of its impressive dimension using fondant or gumpaste, but would be amazing in Isomalt (I just ordered my first package of venuance pearls and can't wait to give them a try!)
Supplies I used:
Shoe #3 and Carved Rose silicone molds

White and Pink candy melts

Plastic decorator bags

Pearl and Pink luster/pearl dusts

Paintbrush

Work surface/ silicone mat

There are a few different methods for melting candy and you probably already have your favorite. I have been happy with putting the candy in the plastic bag on a folded paper towel in the microwave for 30-45 second intervals until melted.
I quickly filled the mold and tapped it several times on the counter to release any trapped air bubbles before setting in the freezer. While my white candy was still melted in the plastic bag, I filled the rose mold as well. I think my biggest challenge was time management and trying to get as many pieces done as I could using just the two molds without too many reheats in the microwave. I did read about using a heating pad under the silicone mat in other tutorials, but was happy to find out that the candy set quickly enough in these molds that I was able to get several set before the decorator bag of candy hardened.


After the candy was set, I gently released the mold by pulling it away from the piece working around the edge a little at a time.

I then used a blade to trim off the excess candy for a clean look.


For my particular project, I wanted to use the shoe as a cake topper, so I added two lines of melted candy on the back to adhere toothpicks. While the white was still melted, I filled another shoe mold to make a matching pair.
For the rose mold, I made sure to squeeze the candy using the tip of the bag into the tiny crevices. This mold needed a bit more tapping on the counter and had more bubbles, but I was successful at getting them out before placing in the freezer.


Again, I worked carefully to release the candy from the mold. From the sound of it, you would swear it must be ripping the mold, but are pleasantly surprised when it remains intact after releasing the rose.

I loved the detail of the shoe so much, I wanted to see it in pink as well since the pictures didn't really show off the beauty and detail of the white molded shoe.


My molded pieces needed for my cake. How about some pearl dust?


I used a dry brush to apply the dust to the candy. You can mix the dust with water, lemon extract or alcohol such as vodka or a clear schnapps for more of a paint, but this worked out great for the look I wanted.


Even happier with the pieces after a little pink to accent the white candy and a little pearl to shine up the pink candy. I placed the white pair on the cake top using the toothpicks and used the roses for a border around the bottom of the cake along with the pink shoe with a dab of buttercream to adhere to the fondant and it was done :)


I enjoyed this project especially since I received a mystery mold that I probably wouldn't have ordered for myself but was very pleased with the outcome :)

Thanks! Sam

DTC Products Used: