Friday, May 11, 2012

First Communion Dessert Table

Check out the amazing display created by Jeannie Gearin using ribbon roses, crosses, cameo settings and a cameo.  

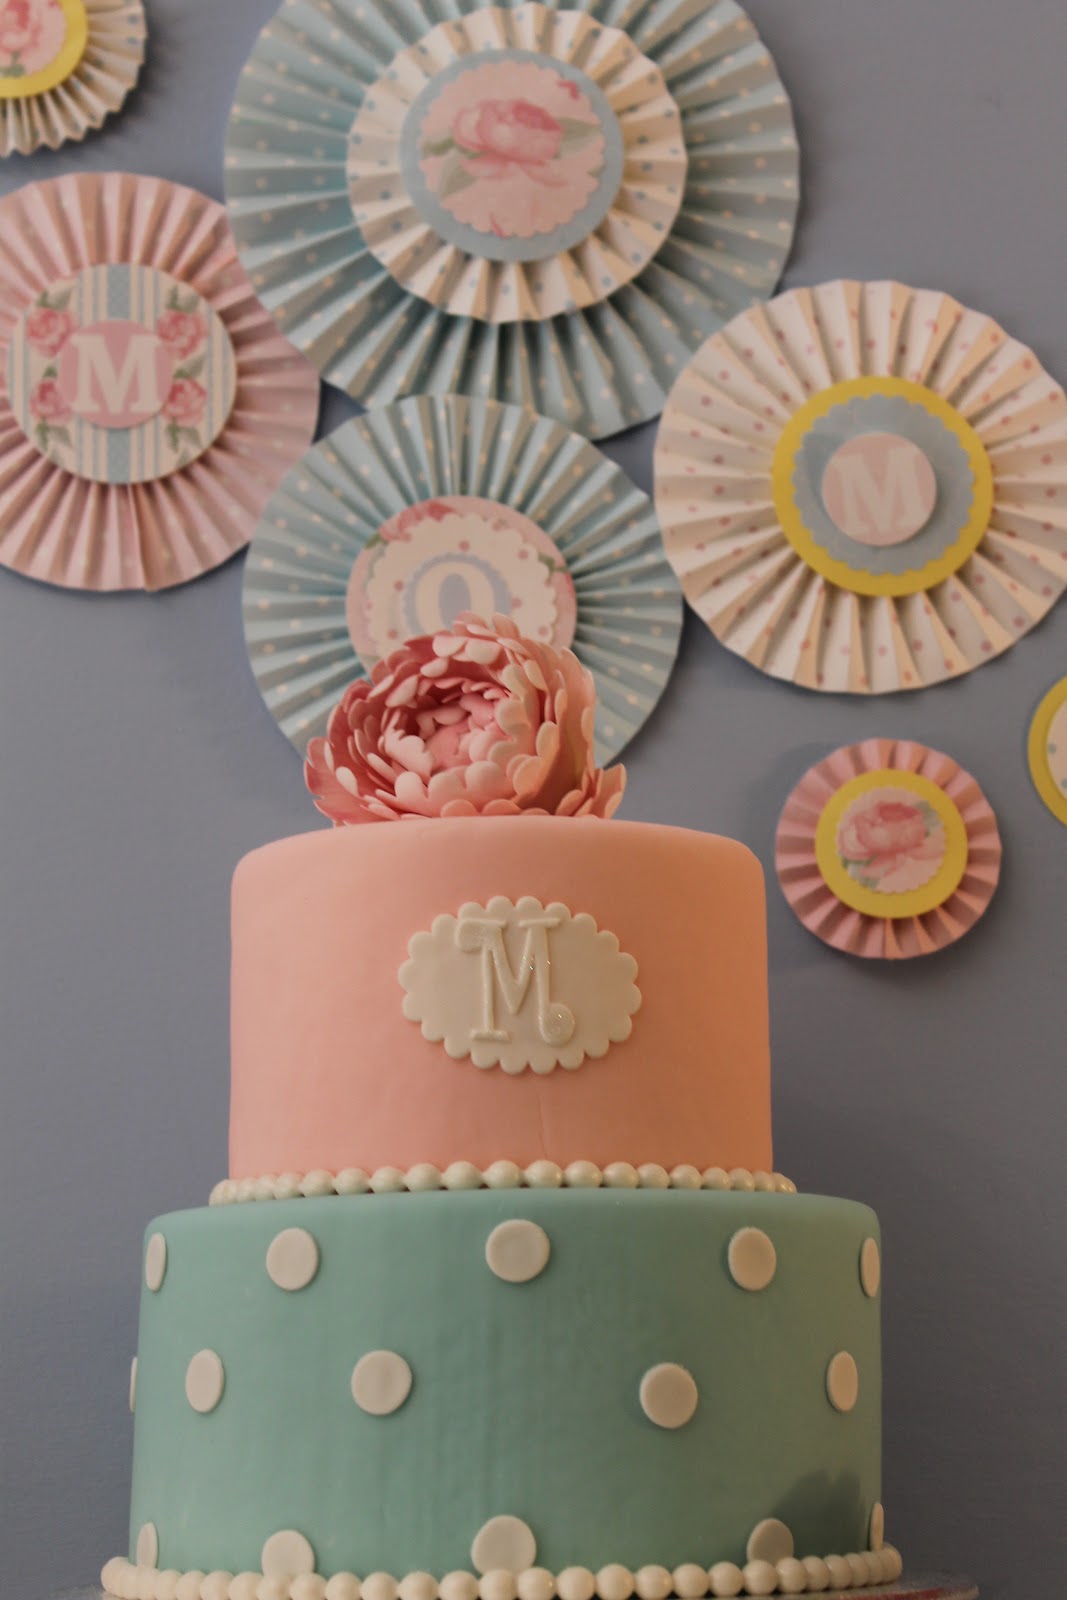
 When my niece  said she wanted "light blue" for her First Communion cake I was a little surprised.  Like, showers and baptism cakes, the colors for these occasions frequently fall along gender stereotypes, and pink is for girls. But, I was pleasantly surprised with how it all turned out.  
 The cake is  an eight inch round topped with a 5 inch round which gave enough room for the flowers.
The cameo setting mold turned out to be a nice frame for the monogram, some of the larger letters may not fit, but the "O" worked perfectly.
 When filling the cross mold I found the easiest method was to roll a log of 50/50 paste and press it down into the detailed areas. This amount of paste was enough to fill the whole mold. When removing the cross, ease out the bottom edge first and then the cross sides and then the top. I found I did not have any cracks using this technique.

 I used an impression mat on the fondant for the dress cookie cutter and added a few pearl dragees.

 The smallest of the ribbon rose mold set added a nice accent for the monogram cookies.
 A nice amount of candy and a nice amount of color!


The favor bags held a variety of candy cookies and white chocolate crosses.
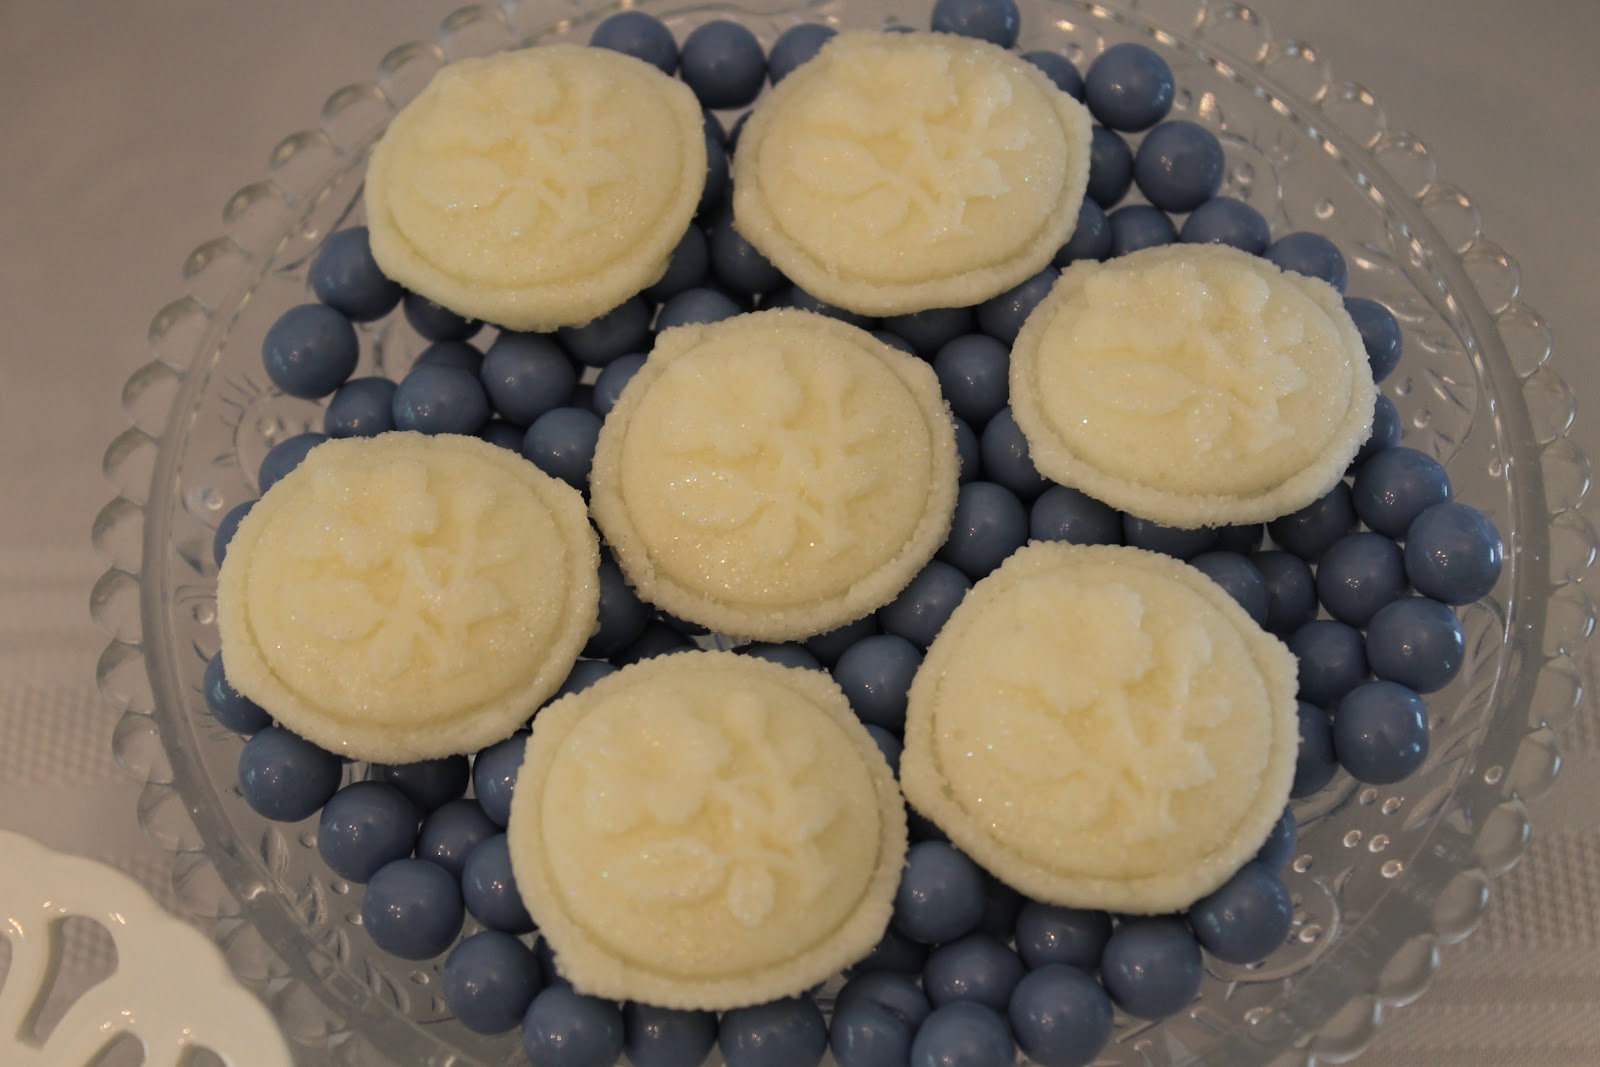
Cream cheese mints are a traditional favorite at our family celebrations.

 Cream Cheese Mints
3 ounces cream cheese                        2 1/2 cups powdered sugar
1/4 teaspoon mint extract

Blend together until smooth. Roll into small balls the right size to fill molds. Roll in granulated sugar.
Press into molds. Refrigerate. Makes about 2 1/2 dozen mints


 Scallop cutters from the craft store make the cupcake picks easy and fast.

Cross Cookies using wilton purple cross cookie cutter.
Desserts and Party styling by Jeannie Gearin http://thepastrytip.blogspot.com/

Thursday, April 26, 2012

Cameos and Cupcakes for Mother's Day

Check out the amazing display created by Jeannie Gearin using some of the new cameo molds and the ribbon roses.  

Of course, a day off from cooking is in order for Mother's Day. A special dessert table just for Mom is an even better treat. The traditional colors of pink and blue, reminiscent of the early days of childhood, are always a favorite of mine.

An "M" for Mom and a sugar peony grace the cake centerpiece.


Sugar cookies are adorned with a detailed floral cameo. The small areas are easier to fill using a small cel stick and then a few minutes in the freezer helps the mold release. A crimper finishes the edge of the fondant circle.


Oval sugar cookies each topped with a different cameo and framed with a molded setting.


Luster dust brings out the detail of the flowers. No sprinkles are needed on this cupcake.


Because so many of my pearl molds, make better single pearls than strings of pearls, that is what I use them for now. They come out very evenly that way.


Ribbon roses are so pretty and versatile.
Making them from a mold goes very quickly. 


 A close-up of the flower cookie.


Oval petit fours are topped with cameos. I find the easiest way to make petit fours is to press cake pop dough into a small square pan to the desired height. Freeze for about an hour. Then cut out desired shapes. Glaze with poured fondant.


I hope you have picked up some ideas for your Mother's Day table. Or maybe, someone will make one of these treats for you!

Jeannie Gearin  Check out her blog


Products Used:

Monday, April 23, 2012

The Jabot Mold


What is a JABOT? 

My friend Wikipedia defines Jabot as :
Jabot (pronounced /ʒæˈboʊ/ ( listen), from French jabôt: a bird's crop); alternatively a bird's croup or craw. Originally the term jabot referred to the frilling or ruffles decorating the front of a shirt.[1] It has evolved into a decorative clothing accessory consisting of lace or other fabric falling from the throat, suspended from or attached to a neckband or collar; or simply pinned at the throat.

My other friend Thesaurus defines Jabot as :

Noun1.jabot - a ruffle on the front of a woman's blouse or a man's shirtjabot - a ruffle on the front of a woman's blouse or a man's shirt
flouncefurbelowrufflefrill - a strip of pleated material used as a decoration or a trim

There... a Jabot is a fancy neckwear!

Because of its intricate details, the cake industry has adopted it as one of its classic designs and pattern.  There have been ways to make jabot details from royal icing. And as the industry evolved, they have developed a  more convenient way to create a uniform look for a Jabot piece. Resin molds, Plastic  and Silicone molds have popped in the cake decorating market.


I was given the opportunity to discover ways to use a jabot silicone mold. As it looks convenient to use, I will have to say it is  very tricky, it is not complicated, it is  time consuming, the result is rewarding! the piece is such a beauty!


DTC offers 2 styles of jabot mold found in this link :

Jabot #1
Jabot #2

Both designs are stunning!


I tried doing the the pieces using fondant, it works but we have to consider the time and the structure of fondant. Fondant cannot be thinned out as much as we can thin out a gumpaste. And because the product will be a thin and delicate piece we need more elasticity and a more stronger paste to do the project. Therefore, we  have to use gumpaste to deal with the Jabot Mold. The fondant can be mixed with a little amount of tylose powder to add strenght and elasticity. The RTU (ready to use) gumpaste is conveniently available in the market. There are many recipes by different cake experts for homemade gumpaste.


 Materials: 


DTC's Jabot Silicone Molds

2 inch size ball of well kneaded gumpaste
shortening (crisco)
rolling pin
tooth pick
dresden tool
small fine clay knife
6 inch rolling pin
foam pad
steamer
forming mat
fine scissors
wire brush
Lots of patience!


 Knead the  gumpaste well and form a  sausage , place the rolling pin on the sausage lengthwise and  flatten it out in the middle making sure that you create a thin well .


Roll sides, lengthening and widening the paste. 


Rub a small amount of crisco on the mold. Lay the sheet of gumpaste you just rolled and press gently but firmly to the mold making sure that the gumpaste adheres and goes through the nook and crannies of the details. 


Make sure the middle portion is thin enough that you can almost see the mold through. 


Trim the edges and smooth the edges with your fingers.


Try to lift the gumpaste off the mold, this is an event that may may you nervous, you shouldn't be, as the shortening you rubbed on the mold will help you lift it up effortlessly!. Lift slowly and check if you got the details. If you left out some, return it back to the mold and press the part where it needed the details with your clay knife.

If you need to patch some broken strings, this is the time to do it. Don't worry if there are film of gumpaste still on the piece, we will clean it out later.


Lay the piece on a foam pad and let it dry for 10-15 minutes.


If the piece has slightly hardened a bit after 15 minutes, take your dresden tool or toothpick, poke the film  of gumpaste on the foam. 


It is easier to  poke the dried film than when it is moist. 


Yes, the back part of the piece will look messy, you can clean it out using the wire brush, but be gentle. Do everything on top of the foam pad so to keep the piece still and safe.  


Steam the back portion of the piece to clean out any remaining bits of  gumpaste scraps.


Let the pieces dry to form on the forming mat for a curved look.  If you don't have a forming mat, use a roll paper towel.


If you want it flat, just lay it on top of a foam or a box with a paper towel.


Note : dry it front side down since the back portion has been steamed. Remember that the back part is moist and will stick on to anything if you dry it back side down.


When the piece has dried up totally dried up you can go back and trim the edges and the details for a more cleaner look.


I hope this short tutorial has been helpful in dealing with
the jabot mold.


Please stay tuned for the continuation of this tutorial as I will be using the jabot pieces in combination with other classic molds that DTC is offering.


Happy Cake Decorating!
 Joanne Wieneke
The Little Cake Patch


DTC Products Used:
Jabot #1
Jabot #2
Scroll Oval Center
Filigree Butterfly


Thursday, March 29, 2012

Bridal Motif Lace

A special thanks to Renea Feagin for the latest blog posting. Learn some tricks to using one of our lace molds! 

Lace Press Tutorial


By Renea Feagin, Baked Expressions


Tools needed:  fondant/gumpaste mix, DTC Lace Press mold, fondant roller


1.        Roll out fondant/gumpaste to about 1/8” thick or down to a 2 or 3, using a pasta machine. 


2.       Lay the fondant/gumpaste over the mold.


3.       Position the silicone lace over the mold, matching up the pattern.  Press into place.


4.       Continue pressing the silicone lace into the mold, using a small fondant roller.


5.       Gently, start peeling away or removing the excess fondant/gumpaste from the mold.


6.       Once excess removed, it should look like this. 


7.       If there is a little fondant/gumpaste sticking over the outline of the mold, just push it back in the mold so that there is no fondant/gumpaste over the outline.  This will prevent you from having to trim the finished lace.


8.       Flip the mold over and bend it at the end or corner and allow the lace appliqué to fall out and release from the mold.


a.       At this point, you can use the mold as one piece or cut out desired portions of the lace appliqué


9.       Brush the back of the mold with water.  Do not over apply the water.  The appliqué should be “tacky” to the touch but not too wet.


10.   Place the lace piece on an iced cake and decorate as desired.


Finished Product!


Visit Renea's Facebook Page to check out more of her wonderful designs.  Baked Expressions

Products Used:
Bridal Motif Lace Mold