Tuesday, January 28, 2014

Cherry Blossom

Here is a quick view of the new cherry blossom mold after we dusted the finished flower with some petal dust.


The colors we used came from The Sugar Art:
Sugar Cookie
Raspberry
Jewel Heart


Brushing from the outer edge in to soften color towards the middle.


As you can see from this picture there is a large under cut on the mold -- If using fondant place the item in the freezer until firm before removing to prevent distortion. 

DTC Product used:


Thursday, January 23, 2014

Triple Scallop Trim

I would like to send a big Thank You to Kathy Finholt for helping me out with the latest blog post.

Kathy sent me a piece of her favorite lace last year telling me that she could no longer buy the lace and wanted a mold.  No pressure on me to make sure the mold came out!  Lucky for us both it turned out well.   I sent her the finished mold and she finally had an opportunity to use it to add a lovely border for this simple anniversary cake.


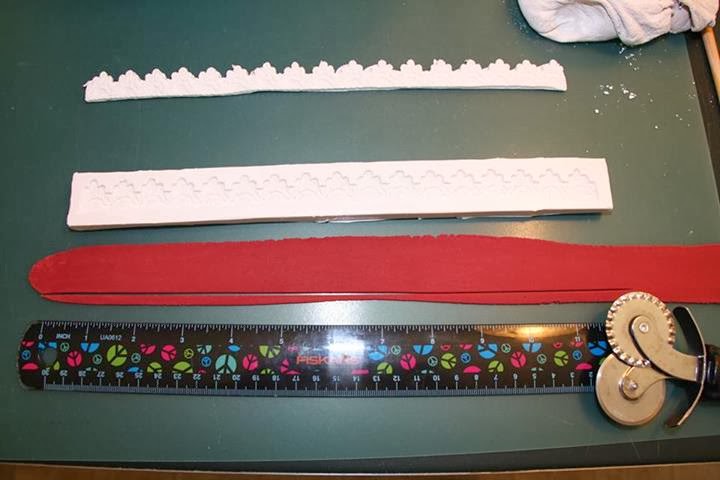
Start by rolling the fondant to a 3 in the pasta machine.  Then using a ruler as a guide and rotary cuter cut the bottom edge straight prior to placing it in the mold.


Next lay the fondant in the mold and place the insert on top.  Press down gently on the insert to ensure you get a nice impression.  Remove the excess fondant and clean up the edges.  Remove the insert and flip the mold over.  Slowly roll the mold back off the fondant gently coaxing it out of the mold.  Releasing this way helps to prevent distortion of the pattern.  Finally apply to the cake.

Additional details on using this mold may be found on the blog post "Of Corset's Lace!"

To see more beautiful cakes by Kathy check out her Facebook page, Kathy's Kakes, LLC.

Products Used:
Triple Scallop Trim

Tuesday, January 14, 2014

Cute as a Button!


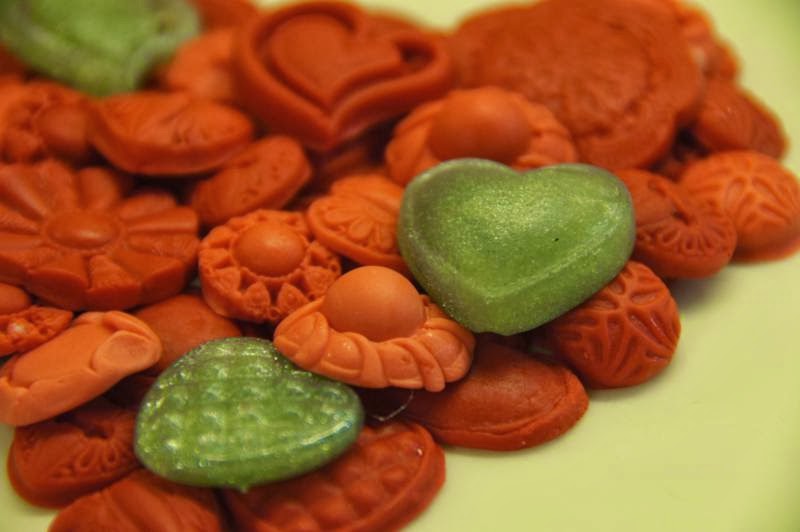
I created this cute button heart mold for a simple Valentine's Day cake.  

For the border we are using the new silver isomalt nibs from CakePlay and the new bead mold they are offering.  


Melt the isomalt in a microwave safe cup.  I used a silicone measuring cup.  Carefully pour the isomalt into the cavity in a stream.  


Once the isomalt is "semi-set" but not "cold" flip the mold over and gently bend back off the isomalt.  It may need a gently coax to get it started.


Then I gently shaped it around the edge of the board. 


I also used the silver isomalt in a few heart mold to add some contrast.  Again I carefully poured the isomalt to fill each cavity to see which I liked best done in the isomalt.  


The red buttons are fondant used in various button and heart molds available from Decorate the Cake.  


DTC Products Used:

Other Products Used:
CakePlay Bead Mold


Saturday, January 4, 2014

Don't Worry....Be Crabby!

I would like to send a big Thank You to Laura White for helping me out with the latest blog post.


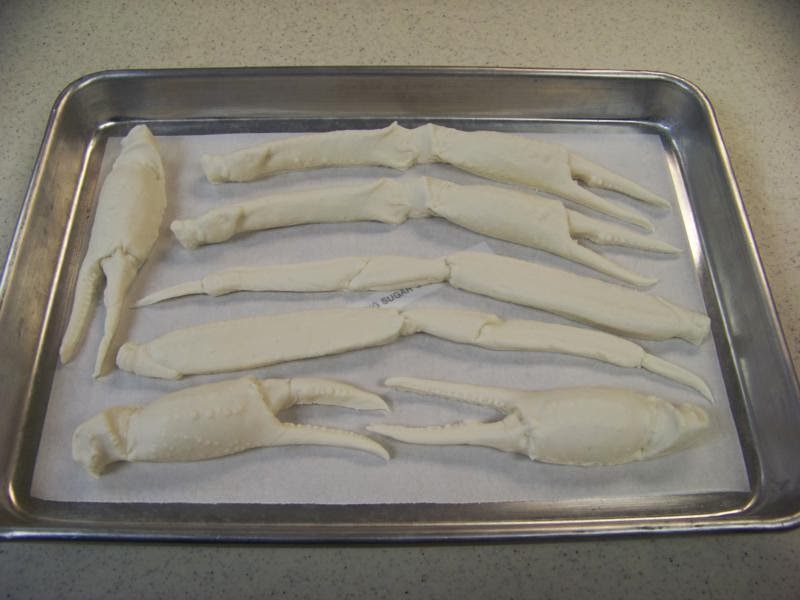
Start out with a light ivory paste.  I mixed half Satin Ice ivory and half white.


Roll a log of fondant about the same shape as your mold.


Snip the small end in half with scissors a couple inches to work into the claw tips.


Trim the excess off the back with a small palette knife. 


I then let them dry for 48 hours.


I dusted with CK Petal Dust layering on different colors.  First I started with Cappuccino (front claw) then added a layer of Sunflower (second claw) then added a layer of orange (third claw) and finally dusting the tip of the claw and large spines with charcoal.  The back claw in the picture is a real crab let for a color guide; looking at the real claw with you dust.  Avoid dusting the "V" shaped areas you will notice on the real leg it is almost transparent looking.  Also avoid the end of the legs/claws where meat would be showing. 


I then airbrushed a little orange to brighten the leg up.


Color check


For my original way I did my corn I cut out the corn kernels with a tiny oval cutter. If you cut through plastic wrap it will round the past making it look fluffy and rounded.  Then I attached the kernels one by one around an ivory core.  You can imagine how long this took.


See blog post HERE for using the corn texture mat method.

To compare:  It took me three minutes to make the corn on the left using the DTC corn texture mat.  Three hours for the corn on the right using my original method!


When making the pot start out with grey fondant.  When finished spray with pearl spray to make a metallic silver.  When I did my crab boil pot I cut the fondant to where it was approximately 1 1/2 inches above the height of the cake.  This is going to serve as the thickness of your pot.  


Generously powder the bottom and sides of a 2" cake pan the same diameter as your cake.  Set this on top of the cake to help support the sides until dry.  


I finished the top edge of my pot with a rope of fondant made with a half circle disc; most clay guns come with this shape.


To make the lid, generously powder a cake pan the same size as your cake.  With a pizza cutter cut a circle an inch larger diameter than the cake pan.  Gently curve and form the lid over the edge of the cake pan.  This will make a lip for a lid.  To make a handle you will want to support a rope of fondant over a deck of cards or small box.  Let dry until good and set so the handle will support its own weight.  


Our finished Crab Boil Pot! 


Laura White

Products Used:
Corn Texture Mat
Crab Broiler Claw
Crab Broiler Claw with Leg
Crab Leg with Tip
Crab Let Set

Monday, November 4, 2013

Silicone Texture Mats and Buttercream?


A very common question I get is if the DTC silicone mats will work on a buttercream cake.  I wasn't sure so I decided to give it a try.

I decided to try it out with the oak tree bark mat.  Since the mat is so deep and detailed I knew I needed a very thick layer of buttercream to start.  I added approximately a 1/3" thick layer of buttercream to the outside of the cake. I made sure the top was smooth how I wanted it.  Then semi smoothed the sides.  I didn't get super picky on this.  Just a quick smooth.  Sorry I forgot to take a picture at this stage.

Then in the freezer the cake went.  I wanted it nice and cold but not frozen.  In my freezer I left it about 15-20 minutes.  I wanted the cake firm enough that it took some pressure to dent when I touched the side of the cake but would move some.

Take the cake out of the freezer and lay the texture mat next to the cake and very firmly and evenly press the mat into the cake.  I was by myself so not the best picture.  Press firmly.  You can use a fondant smoother to make sure it is evenly pressed. When you have the nice thick buttercream layer and you are pushing on it like this it will force some of the buttercream up above the top edge of the cake.  I liked this look and played while pushed to get the somewhat rough top edge that bark would give.


Gently pull the mat away.  I did get some of the buttercream stuck in the deep crevices but only after the cake has been out a while and I kept futzing with the cake.


The buttercream really picks up the details!


Quick airbrush with some various browns.


Add some grass and butterflies and I'm all done!

DTC Products Used:

You could also use:

Monday, October 28, 2013

Going a Little Batty


I wanted to make an isomalt moon for the top of a cake.  I decided in this spooky season it needed some bats on it.  To get this look I'm using DTC's new bat inlay to get the above look.

Materials needed:
Bat inlays
Isomalt - I used CakePay isomalt nibs
Metal round cookie cutter
Cooking spray or some type of oil

Lightly spray the inside of the cutter ring with cooking spray then wipe off excess with a napkin.  Arrange the bats on a silicone mat or lightly oiled marble surface and place ring around the bats.  (Some pictures show two bats and some show three -- I made a few before I found one I liked.)


Place isomalt nibs in an microwave safe container -- warm in 30 second increments in microwave until fully melted.  Gently pour over the bats.


Stop when you reach the desired thickness and the bats are covered. 


Once cooled -- time will depend on the temperature in the area -- gently remove the ring.


Use a palette knife to gently pull the bats out from the back.


If you have any surface bubbles they can be removed by a quick blast with a blow torch.  Be careful if you do this over the thinner bat sections as they will melt quickly.  To help with the bubbles make sure to wait prior to pouring for the bubbles to dissipate.  I waited longer on the moon with with two bats and there are very few bubbles.

If the isomalt gets cloudy over time -- or you touch it too much -- and it gets dull looking you can use a small amount of vegetable oil on your finger and gently rub over the surface.


Here are some close ups of the other features of the cake:


DTC Products Used:
Bat Inlay
Coffin
Small Bat
Medium Bat
Skeletal Hand
Skulls - 4 Mini
Skulls - Horizontal Border
Web