Thursday, February 10, 2011

"Out Of The Jewelry Box"

Diamonds may be a girls best friend, but sugar jewelry might just come in a close second.  This amazing blog post from our DTCPUG member Nancy Mitchko is a must read.  What amazing techniques and instructions - Not to mention the BEAUTIFUL finished products!  Thank you Nancy for sharing your beautiful work!  Can't wait to see what is next from you!

My name is Nancy Mitchko and I am a first time poster. As an instructor and a life-long cake decorating junkie, I cannot tell you how much fun I had working on new techniques for these beautiful molds.
Jewelry can brighten any girl’s day…same goes for their cakes. My first tutorial will discuss some techniques for simple, elegant brooches are easy to create and are stunning accents when finished.
Filigreed Brooch
Supplies

Fondant, gum paste, 50/50 blend (mine are fondant)
· Cream
· Dark Chocolate or dark brown
Luster Dust
· Gold
· Silver
Shortening
Vodka, lemon extract or Ever Clear (whatever you prefer)
Brushes
· Soft bristle – dry
· Fine detail
Plastic scraper or Metal off-set spatula
Dusting puff with confectionery sugar
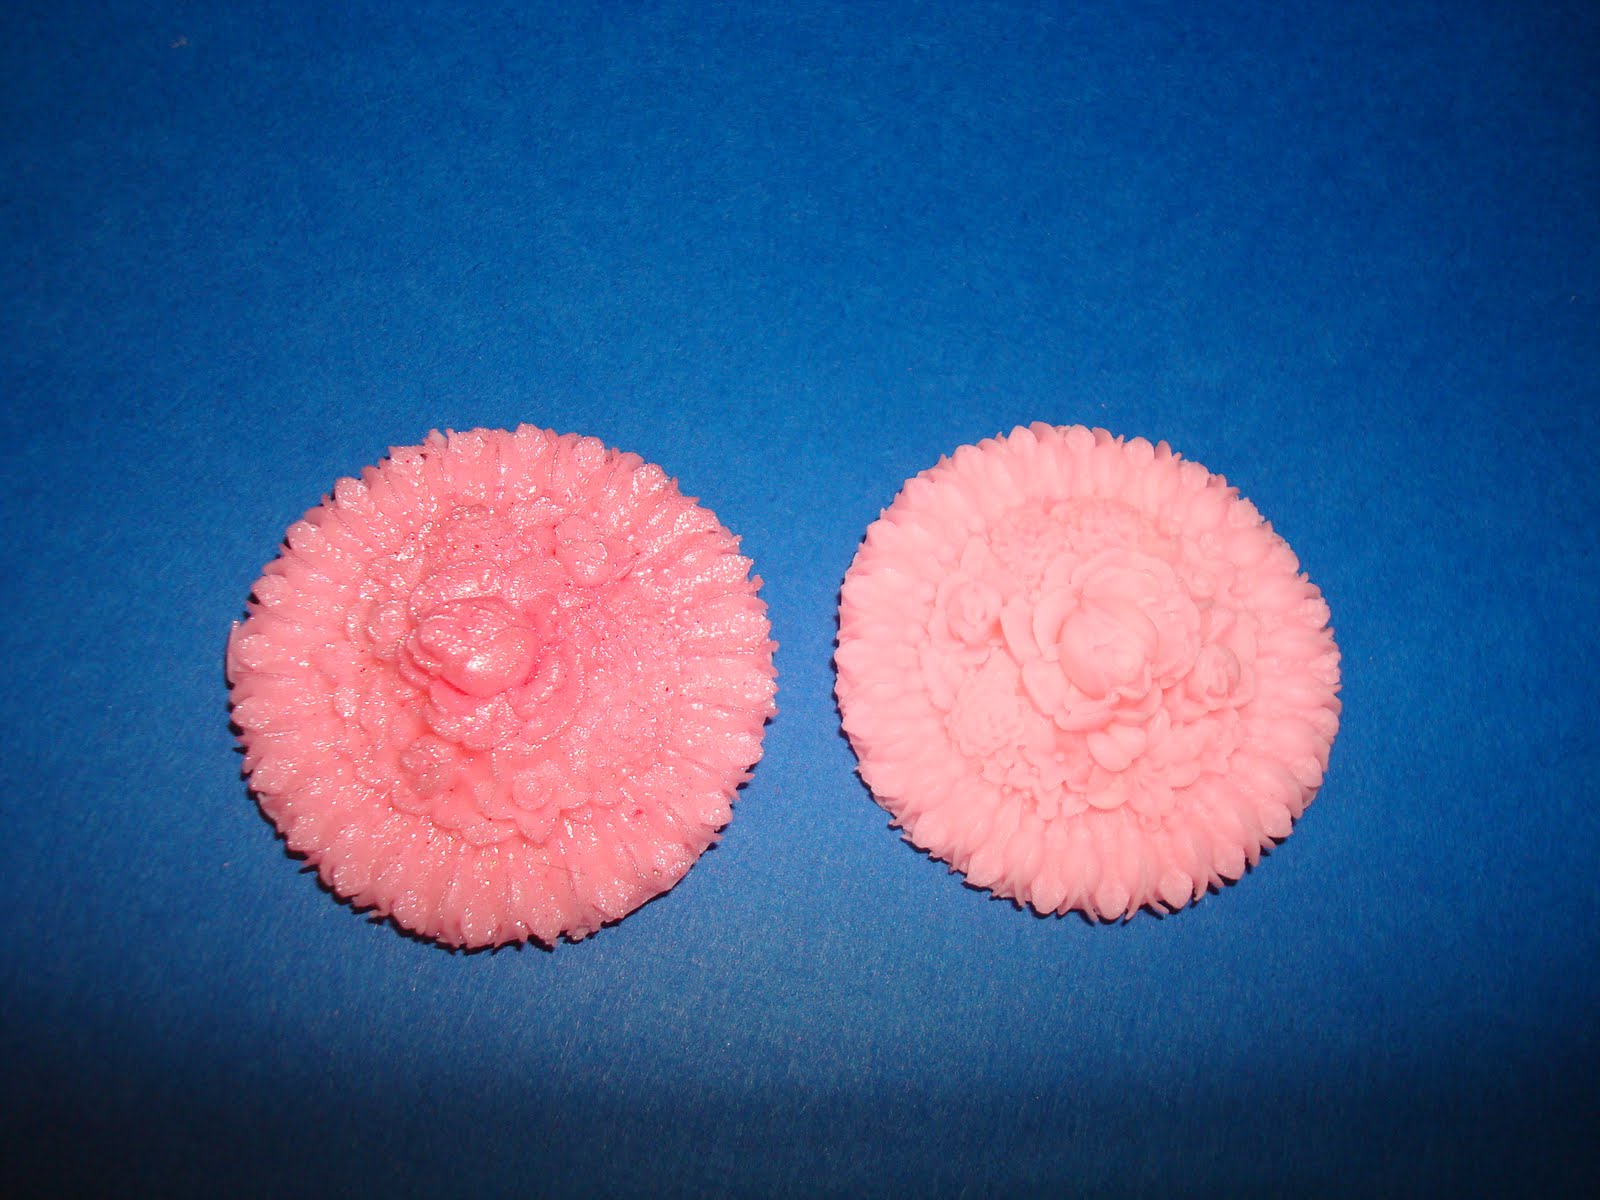
Ivory Inspired Brooch:
Knead a small amount of cream colored paste until it is soft and pliable. Roll into a ball and coat with a thin film of shortening. Place in the center of the mold. Using your thumb, firmly press the paste into the mold and stretch the paste out to the edges. Be sure to press hard enough to get all the wonderful detail from this mold.
Use a plastic scraper or metal spatula to trim off the excess paste. After trimming, go back and clean the edges by gently pulling you thumb from edge toward the center. Smooth the back by gently rubbing with your thumb in a circular motion. Invert on a flat dusted surface and press down.
Place in refrigerator for 5-10 minutes until firm.
Release brooch from mold by first carefully flexing the edge of the mold to release the edges. Invert and pull back until the piece it removed.
Let dry 12-25 hours.
This mold is lovely as is, but if you would like to embellish, use a bit of vodka and the gold luster dust to create a paint-able medium. Paint the edge of the brooch with the detail brush to create a setting for your filigreed piece. Let dry. Gently pass the piece through kettle steam to set the colors and give a very natural sheen to your piece.
Antique Silver Brooch:
This brooch is created in a similar fashion as the ivory by using the dark chocolate paste to cast the piece.
To prepare the mold, using the soft bristle brush, generously dust the mold with silver luster dust. The fine details will make it difficult to get into those spaces when the piece is dry. By dusting before it is cast, the silver will get into all the nooks and crannies and also serve as a releasing agent.
There is no need to put apply shortening since the mold is dusted. Just fill and shape the piece as above with pressing into the mold, trimming and cleaning. Place into the refrigerator until firm to the touch.
Turn out and let dry.
Dry dust your brooch with the soft bristle brush to add a little extra glitz to the upper edges. Steam and let dry.
(Hint: Sugar pastes not your favorite medium, use tempered chocolate and just pour. Let set in the refrigerator until set (5-10 minutes) and just dry dust to add color and metallic affects.)
Cabochon Brooches
Cabochon brooches are distinctive by their round topped central gemstone. Whether the setting is simple or ornate, the central stone is the focal point in these pins. To that end I have combined techniques to create the contrast between stone and setting.
Sugar work is all the rage, but for the novice decorator or a small piece, isomalt and sugar work can be intimidating. This tutorial will help make the process easier and less daunting.
As the daughter of a diabetic, I spend lots of time adapting recipes to so Dad is not left out. I have become accustomed to reading ingredient labels. I was picking up some hard sugar free candy and what to my sugary surprise…they are made with isomalt. I brought them home and the experimentation began!
Supplies

Sugar free hard candy (eg: Life Savers, Crystal Light)
Microwave oven
Fondant, 50/50 Blend, Gum paste, candy clay or chocolate (mine are fondant)
· Cream Colored
· Dark Chocolate
Rolling pin
Plastic scraper or Metal offset spatula
Brushes
· Soft bristle
· Fine Detail
Luster Dust
· Gold
· Silver
Disco Dust
Vodka, Ever Clear or lemon extract (whatever you prefer)
Tappit Alphabet cutter (or whatever motif you have that fits)
Dragees
THE GEM
Select color for the gem you wish to make. Crush candy and place in the gem cavity of the mold. Fill to the top to slightly above depending on the size of your pieces. Smaller ones melt easier, but are more difficult to move. Use a clean, soft brush to remove any stray “candy dust” that might be outside the gem cavity.

Place mold in the microwave on high for 30 seconds. Remove and tap on tab top to get the sugar level and have any air bubble migrate to the top. Let set until hard and cool (about 5 minutes).
You have just molded sugar! The next parts will give you some ideas as to how to set your stone.
Embellishment (once cool and hard)
· Dust with silver luster dust OR
· Sprinkle with Disco dust
Simple Setting

Plain Stone
Knead paste until soft and pliable. Roll into a ball and place in center of the mold. Using a rolling pin, roll out paste to fill the mold.
Trim the excess with a spatula or scraper. Clean edges by stroking with your fingers from the edge toward the center. Smooth back with your fingers, invert mold and press on a flat surface.
Place mold in refrigerator 5- 10 minutes or until firm.
Embellished Stone
Cut out initial or motif with that fits inside the gem. Gild initial with luster dust/alcohol paint. Let dry. When dry, place upside down on gem in mold and gently press to be sure it makes good contact and lies flat. Sprinkle with Disco dust.

Knead paste until soft and pliable. Roll into a ball and place in the center of the mold. Press the paste firmly, stretching the paste from the center toward the edges to fill the mold.
Continue as above.
Embellished Setting

Once gem is set and ready, place dragees in the round spaces.
Fill mold as in ‘Embellished Stone’ so that the dragees stay in their wells.

Finishing
When firm, release the edges and turn out the piece. Let set for around 3 or more hours. Dry dust the setting or for more coverage, paint with metallic luster dust. Steam and let dry.
Hints: If you are looking for an antique look, use dark chocolate color.
If you want the antique look, but lighter stone, cut a small oval of a light background color and place it over the gem before finally filling the mold.
Don’t have dragees, and you are filling with light paste, fill the mold and then dust or paint the little pearls when you are done. If you are using dark paste, then first fill the wells with light paste and chill. Fill the balance and chill again before removing. Dust with Pearl or paint as desired.
Don’t like sugar pastes; fill with melted, tempered chocolate and dry dust the colors.

Cameos
Cameos are reliefs carved from agate, glass or shells on a contrasting background. Long associated as a symbol of gentility in the Victorian age, cameos in fact date back to early Romans.
Supplies

Fondant, gum paste, 50/50 blend (mine are fondant)
· Cream
· Light Jade Green
· Gold
· Dark Chocolate or dark brown
Luster Dust
· Gold
· Silver
· Blue
Shortening
Vodka, lemon extract or Ever Clear (whatever you prefer)
Soft bristle brush – dry
Fine detail brush
Plastic scraper or Metal off-set spatula
Dusting puff with confectionery sugar
Rolling Pin

Angel Cameo

Knead cream color paste until soft and pliable. Form a ball and coat with a thin layer of shortening. With a pin, roll from the center, out to the edges to fill the mold.
Trim the excess with a spatula or scraper. Clean edges by stroking with your fingers from the edge toward the center. Smooth back with your fingers, invert mold and press on a flat surface. Place mold in refrigerator 5- 10 minutes or until firm.
When firm, release the edges and turn out the piece. Let dry for 3 or more hours.
Dry dust with gold luster dust on high relief. Dust with blue on the angel’s dress.
Using the gold/alcohol paint the delicate swirl setting around edge.
Steam and let dry.
Portrait Cameo
Knead cream colored paste until soft and pliable. Roll a small piece into a ball and place in the face of the cameo. Press to fill just the portrait space in the cameo. Remove excess so that the edges of the face are sharp and the center is slightly under filled. Under filling the mold helps to avoid overflow when pressing the next layer in and keeps the edges crisp. Chill in the refrigerator until firm.
While face is setting, soften and marble a piece of jade and cream fondant. These colors, when marbled will give the effect of the stone veining and add realism to the piece.

When firm, fill the mold by rolling the marbled paste into a ball and placing paste into the center of the mold. Using a rolling pin, roll the paste out to fill the mold. Trim and clean edges.
Return to the refrigerator until firm.
Release the edges and turn out the cameo. Steam and let dry.
Portrait Cameo in Frame Setting
Fill portrait as above. Chill until set.
Marble the golden and cream paste and roll into a ball. Press the ball into the mold with fingers up to the first ridge. Again, trim extra, clean edges, and under fill the center of this layer. Chill until firm.
Soften and fill the mold with dark chocolate to finish the brooch. Trim excess. Clean edges and chill.

Release edges and turn out the finished cameo. Let set for around 3 or more hours. Dry dust the frame of the cameo with silver for an antique look.

Steam and let dry.

As a testament for the quality of these molds, I had left my pieces on the table so I could photograph and husband wanted to know where I bought the new jewelry!
I hope you have as much fun with these superior molds as I have. The combinations are limited only by your imagination. Inspiration is only a jewelry box away!
If you have any questions, feel free to contact me through the DTC Blog website or at nemitchko.DreamSweets@gmail.com.

Tuesday, February 8, 2011

Brooch Tutorial

Our Brooch molds are some of the most popular on the site, and here Lisa show us how to make a beautiful Tall Scroll pin.  This was one of our very first products and was a brooch that I purchase in Boston in the early 90's, so it is very special to me to see it in work!  Thanks Lisa, Love it!

Hello, my name is Lisa and this is my first tutorial. This will show you the simple steps to creating the tall scroll pin brooch using fondant.


The items you will need for this is the mold, a small rolling pin, and a ball of fondant the color of your choice. Take the rolling pin and roll out the fondant a little bigger than the mold.

Take the fondant and lay it over the mold and gently push it in with your hands.


Then take the rolling pin and go over the fondant and the mold. This will make sure it gets in all the crevices. So you don't miss any of the detail in the mold.


When you are finished rolling, gently pull the fondant out of the mold. You will need to trim the excess fondant from the edges. You can use a small knife or cutter for this.


This is the brooch after it has been trimmed. I chose to take the middle layer out but you can leave that in depending on how you want it to look.


This is the final example dusted with gold and attached to some fondant ribbon. The pattern behind it is also from Decorate the Cake. It is the feather swirls texture mat.


I hope you have enjoyed this tutorial. I look forward to doing more projects in the future and sharing them with you.


Sunday, February 6, 2011

Sand Dollar and Starfish Tutorial

Let's welcome Shena Setzer to Decorate the Cake's product user group!  Shena's project included 2 of our newest beach themed molds the knobby star fish #2 and the small sand dollar.  Shell molds are amoung my favorite to create, maybe because I have to make a trip to the beach!  Thanks again Shena! Love the work.


Hi everyone! My name is Shena Setzer and I have a small home based business Everything Else is Cake. This is the first tutorial for Decorate the cake and I am so excited to be a part of the DTC Panel.
I decided to use the sand dollar and starfish molds on store bought cakes to show that any cake can become something custom and unique.


Tools Needed:
  • Starfish and Sand Dollar Molds
  • Gumpaste
  • small knife or spatula
  • small painters brush
  • desired pearl or luster dusts
  • shortening
  • small rolling pin (not pictured)
Dtart by adding a small amount of shortening to the molds. Use just enough to coat the molds and the shortening should remain clear an
d not build up. Next add a small amount of gumpaste to the molds and press firmly and evenly throughout the mold.


Next, trim the excess gumpaste away with a knife or spatula.


This is how it should look before removing the gumpaste from the mold.

To remove from the mold, turn it mold where the gumpaste is facing your work area and slightly bend the mold. It should slowly pop right out. I found with the sand dollar, it was easier to release it into my hand.


On the sand dolllar, I had excess gumpaste that I wasn't able to trim away still in the mold. Here I cut away the extra gumpaste with a small knife.


Here is what the removed gumpaste should look like!
 

To add color, use the paintbrush and brush the luster dust directly onto the starfish. Use a small amount of luster dust and make sure to tap the brush before applying. If you have trouble getting the dust to adhere to your gumpaste, use a small few drops of alcohol and mix it with a small amount of luster dust.
 
 
That's it!! Here are the finished products where is basically just attached directly to the cakes. The first is a standard buttercream cake and the last two are snack cakes. For the snack cakes, I "glued" the pieces onto the cakes with light corn sryup.


I hope you enjoyed this tutorial and found it very useful! I had a lot of fun doing it!! Please visit my website and feel free to contact me with any questions.

Friday, February 4, 2011

Decorate the Cake Project: Brooches and Cameos

How about some Bling?  Hannah brings us the next instructional how-to featuring DTC's brooches and cameos - Arent they beautiful? Thank you Hannah! 


I am Hannah and I am new to the cake decorating world. I started a year ago and took the Wilton Classes and instantly fell in love with decorating! This was my first time using silicone molds and I absolutely love them. They are so easy to use and the detail is amazing. Decorate the Cake molds are great and I can’t believe I haven’t tried them sooner.

Tools I used:Fondant/Gum paste mix 50/50
X-acto knife
Gel color
Fondant Roller
Pearl Dust
Soft bristle brush
DTC silicone molds


1. First I colored my fondant/gum paste and then rolled into a ball and pressed into the mold. Then I used the fondant roller to smooth the back of the fondant. Be sure to push the fondant into the mold to get a good impression.


2. Next I placed the mold in the freezer for 5-10 minutes. This helps the fondant release easier plus when I trim the excess fondant it helps to prevent the heat from my hands warming up the fondant and distorting the shape. Trim the excess fondant with an X-acto knife.


3. Finally I brushed on some pearl dust. I think this really makes the details pop and gives the piece dimension.


Here are some examples of the silicone molds for brooches and cameos that are available at Decorate the Cake:


Here is a finished cake using one of the brooches I made with the molds. It really dresses up a simple cake design. I loved using the molds and can’t wait to come up with new ideas to utilize them!

Thanks for the opportunity for me to be part of the DTC project user group!


Wednesday, February 2, 2011

Be My Valentine Mold Set Tutorial


Valentine's Day will soon be here! The next project is from Rachel Daniel-Scott and features molds from our holiday category, specifically Valentine's Day.


Hello, my name is Rachel Daniel-Scott, owner of Rachel's Creative Confections and I am new to Decorate The Cake's Blog. It's my pleasure to be here and included among some of the greatest cake decorating talent I have ever seen.

My project to test for all of you is the "Be My Valentine" silicone assorted hearts mold set. Valentines Day is one of my favorite holidays, second only to Halloween. Its a holiday of delights for any artist in the confection industry. I chose to make a small round cake and some cupcakes using a 50/50 mixture of fondant and gum paste in the molds.

Supplies you will need for this project:


  • your silicone molds
  • non stick cooking spray or shortening
  • pallet knife
  • artist brushes
  • toothpicks
  • luster dust & small mixing dish
  • small amount of vodka or extract
  • fondant, gum paste, or molding chocolate
  • silicone mat or wax paper

  • gel or liquid colors to tint

    First I used the color to tint my fondant and gum paste mixture. I used popular Valentines Day colors of shades of pink, purples, red and white. I sprayed the molds lightly with non stick cooking spray and with a gloved finger rubbed the inside crevices, as these molds have some very intricate designs.

Second I rolled small balls of my fondant gum paste

mixture and pressed gently into the molds.


The molds were easy to work with and the designs turned out very well. If any fondant became stuck in the mold I would gently use a toothpick to clean it out, respray with the non stick spray and mold it again. To release from the mold I just gently pulled the edge away, flipped them and the finished hearts would practically fall out into my hands.

(Note: I did have 2 stubborn hearts, the smallest script "Be Mine" and the "Sweet Heart", their designs are so tiny and intricate that I had to put them in the freezer for about ten minutes to keep from breaking off the tiny little dots , dashes , and swirls")


I started out with single colors and then began to layer the colors.

Some of the molds I filled partially to leave off the background edge to give a different look.


The 2.5 inch hearts came out lovely, but the mini hearts were my personal favorite and were just begging to embellish cupcakes.

After molding I placed all of the hearts on a cookie sheet to dry and harden overnight.


The next morning I used my luster powders (silver and gold) some dry and others with a few drops of vodka to make a paint in the small mixing dish for thicker coverage. I highlighted all of the design areas, edges and script using very light strokes of the artists brushes.. They look amazing.


I allowed them to dry for another 4 to 6 hours, then began assembling my cakes. I frosted the cupcakes with pink and lavender tinted butter cream, added sprinkles and the mini hearts for embellishments. I frosted a small round with bright pink butter cream adhering some of the hearts to the sides of the cake with royal icing. I also added piped scrolls and swirls with tiny fondant heart cut outs on the sides of the cake. Then for the top of the cake I placed 3 of the cupcakes along with the rest of the hearts which I glued together in a ring with royal icing.

Overall it was a very fun and cute project. I love the heart molds and their versatility. They could also be used to make molded chocolate toppers for heart shaped cookies or molded gelatin treats.

Thank you for allowing me to be a part of Decorate The Cakes Blog and use your fantastic products. Happy decorating everyone !


Monday, January 31, 2011

"Poseidon's Cookies" Large Sand Dollar Silicone Mold Tutorial

Here is the last in the series of tutorials from Joanne - What fun it has been seeing her ideas and concpets come to life using our products - So as I prepare for the "blizzard of the century", I thought how nice - something to make us look forward to spring and summer -- Hope you enjoy!

Melissa


This is the Third Part of the Beach Molds Tutorial. I will be using the Large Sand Dollar Silicone Mold and talk about conceptualizing designs for cookies , executing and presenting the design.
A simple cookie can be turned into an elegant and upscale cookie once they are properly decorated. It is never an easy task to design a cookie, imagining can be sometimes stressful. Sketching your ideas help, adding color to your sketches helps some more, but laying out a design on a cookie photo helps a bit further and makes your design idea realistic before tackling the whole project of decorating an entire batch of cookies.


Materials and Tools :
Large Sand Dollar Mold
Fondant
shortening
Luster Dust
Gold Dust
Pearl Dust
Paint Brush , Soft hair , flat or filbert (at least 2)
Small amount of vodka
rolling pin
Plastic pastry scraper or small metal spatula
Cookie Cookbook with large photos ( I like Martha Stewart Cookie Book)


First, look for a good cookie photo from the pages of a cookie book or magazines, this will also help you in imagining if the embellishments, edible paints and luster colors to match a sugar cookie or a chocolate cookie. It is best to find a photo with the same size of your actual mold, if you don’t have an exact size of photo for the mold, you can photocopy, reduce or increase size.


To make the fondant sand dollar, knead a good amount of your fondant and roll it into a ball. Rub a small amount of shortening in the cavity of the mold and lay the ball on the center of the cavity of the mold, press it flat and firm, and with a rolling pin, roll out the fondant to fill out the entire cavity.

Trim excess fondant using the metal spatula or plastic scraper. Let the rolling pin smoothen out the trims. Gently unmold by releasing sides and let the mold face with cavity side down, bending the mold slightly until the molded fondant drops on the mat or just simply unmold it in the palm of your hands. This will be your sample to play around with.


Place the sample fondant sand dollar on top of the cookie photo, from there, you can start applying colors using golds and luster dust. Start blending colors on the center impression on the sand dollar (flower). Once the flower has popped out , you can start gilding the sand dollar with gold or simply brush the whole area with pearl dust, embellishing in any way you want. Once you achieved the desired effect, you can start cutting out and baking your cookies.


Tip: use a cookie cutter which has the same size as that of the actual size of the sand dollar. The cookies will expand during baking process.
Cool the cookies before decorating them.


At this point when you are waiting for your cookies to cool, you can make more fondant sand dollars equivalent (or more) to decorate the amount of cookies you are making. Dry the molded fondant sand dollar on a cookie sheet lined with paper towel or tuff board and insert a folded sheet of tissue paper under, around 3inx3in to help shape the sand dollar on a concave manner as it dries.

While the sand dollars are resting on the cookie sheet, you can start embellishing it. It is best to embellish a batch of fondant sand dollars in an assembly manner, it can save you time, but you can also embellish it one at a time if you wanted each sand dollar to look unique from each other.
Adhere the fondant sand dollar on the cookie by using a clear piping gel or corn syrup. Let the decorated cookies rest overnight in a linen box lined with paper towel or parchment paper before serving or packaging them…


When serving to your guests, I find it attractive for the cookies to be plated on a bed of brown sugar to capture the feel of the beach...

Or when the cookies are to be given as gifts, it will look elegant if packaged in a box lined with shredded parchment paper, I prefer using the kraft parchment as it has a natural brown color to match the tropical feel of the cookies.

It was truly a wonderful and enjoying experience doing a series of tutorial here at DTC. I hope to contribute more projects and ideas in the near future. If you have any question, feel free to contact me via Decorate The Cake or email me at mailto:thelittlecakedecrator@thelittlecakepatch.com. At the same time I would like to invite you to visit my website at http://www.thelittlecakepatch.com/.
Happy Cake Decorating!
Joanne

Poseidon's Cookies