Thursday, August 16, 2012

Get Out of the Dog House!


This cake is sure to let you out of the dog house!


It is a pretty simple cake -- but the spiked dog collar bottom border puts it over the top.


Roll out a length of fondant to the size for the mold.


Lay the fondant on top of mold cavity and press in.  To get the fondant into the spikes you will need to really push it in.


Use a rolling pin to smooth down the back of the mold.  Take a small knife and trim off the excess.


Pop in the freezer to harden -- this is necessary to get the spikes out intact.  Have a bowl of ice cream while you wait!


Turn the mold upside down and gently roll up.  As you come to each spike, gently stretch the mold to pop it out.  I accidentally ripped one off - while it was still frozen I put it in place with a touch of gum glue and it stayed affixed just fine.


Get some supplies out to dust the spikes!  I mixed a little of Albert Uster's gold dust with vodka.


Paint the spikes.


Products Used:
Spiked Dog Collar
Doggie Assortment
Paw Print Texture Mat

Friday, June 22, 2012

Ambulance Paramedic Bag using DTC Zipper Mould

Jo Marshall-Orr lends her talents to the DTC blog show off the zipper mold and her amazing talents.


I made this bag using the DTC Zipper mould - I found it a fantastic way to get definition and it looked so real I was asked many a time if I had used real zips.
This mould is really easy to use with this simple tutorial
Equipment: DTC Zipper Mould, rolling pin, stitching tool, Fondant knife, white fat & 50/50mix of Fondant/Gumpaste
Very lightly grease mould with white fat
Roll 50/50 Fondant/Gumpaste  into a log same approximate length of mould

Squish 50/50 mix into mould
roll over with rolling pin to smooth & get good definition
Scrape off excess using a fondant knife
Place in freezer for 5-10 minutes this helps alot in de-moulding anything from silicone
De-Mould I start at the thicker end
Flip the Mould over & place zipper onto backside this makes it easy to remove after
Using the stitching tool add a deeper impression along the zip
Doesn't this look so real! I love this mould.
As shown in the photos I then used a little rectangle of the same colour of the cake & using the stitching tool made a piece to fit over the ends of the zip for a sewn in look.

Hope you enjoy this mould as much as I do
Jo from Ciccio Cakes
To get the effect of the 2 zippers joining just fold under the end bits and use the stitching between them 

Product Used:
Zipper - Closed

Also Available:
Zipper - Open

Thursday, June 14, 2012

Pigs, Bacon and more!

Jeannie Gearin does it again with another amazing blog post.  This time it is a great idea for Father's Day!

Grilling and Father's Day just go together. Many men believe themselves
to be the King of  the Grill and that was behind the theme
for this cake and the matching cupcakes. And at the end of this
post, one more use for a pig mold.

For the board, I covered it with light brown 50/50 paste and then imprinted
the it with a wood grain impression mat. I took a ruler
and marked off wood plank lines. I used a mix of brown and black food
color with vodka and painted in the deepest areas to make them
stand out more. Then, to make it look like painted barn wood, I brushed the board with red dust. I  set aside to let it dry.

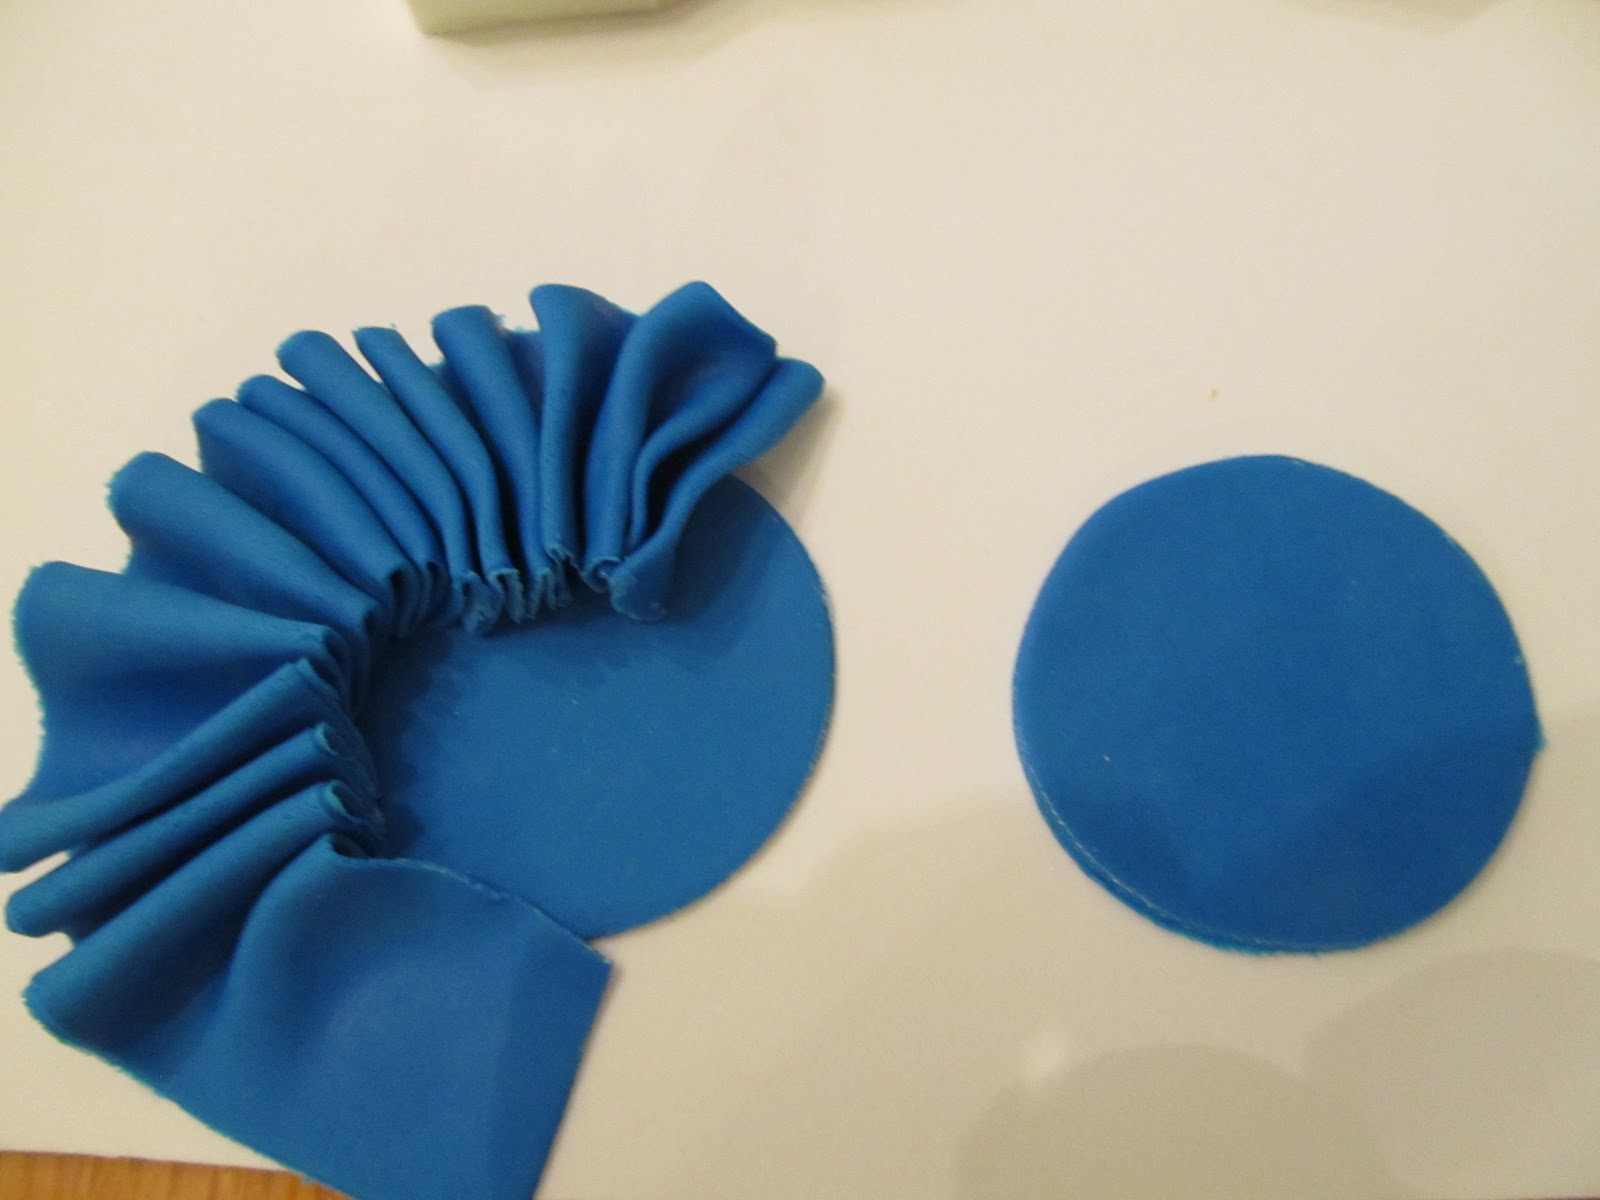
I made the ribbon by cutting a circle and letting it dry over night.
I used the ribbon cutter to cut a long one inch wide
strip and gathered the center up into folds. I attached it
to the circle with piping gel and let dry.


 The pig molds can be filled with one color gumpaste and
color brushed  on or with multiple colors. I used pink for the
 pig face and red for the bandana.
I always have better luck with chilling molds in the freezer
for a few minutes.Then, releasing them after letting it sit at
room temperature until it is not so cold and brittle.
I found the markers were easier to use than the paintbrush
for adding details. Mostly, I liked that it dried quicker,
but I am sure it is a matter of personal preference.
A little pink blush on the cheeks and inner ear gave the
pig face much more character.
 The two pigs together make a sweet pair.


These pigs are a nice size for cupcake decorating as well as
cake designs.
I made the banners using a clay letter embosser from the
craft store.
The rope border was made with a clay gun.
The fence was also done with the wood grain
impression mat. A toothpick is inside the fence posts
for support. This was a fun cake to make
and could be customized for several different
summer occasions.

Pigs =Bacon!

Maple Bacon Toffee
{with Chocolate Pigs}

I used my current favorite recipe for toffee which is
from the book Sweet Confections by Nina Wanat.
I added 1/2 teaspoon of maple extract.
After spreading the toffee out on a silpat and
 allowing it to cool, I spread 6 ounces of
semisweet chocolate on top and let chill.
Then, melt another 6 ounces of semisweet chocolate
 and spread that on the other side of the toffee.
While still warm, sprinkle about 2 slices of crispy, crumbled
bacon on top. Sprinkle 1/2 teaspoon fleur de sel to the
top of the toffee, working quickly before it cools.
Break into pieces and enjoy.

Any standard toffee recipe can be used.
Add to a bag with chocolate pigs and
tie with a bow for Father's Day gift, or
a summer hostess gift or...


Products Used:
For more amazing work from Jeannie, check out her blog, The Pastry Tip!

Tuesday, June 12, 2012

Puppy Paw Print Tutorial


Here's a quick tutorial for Decorate The Cake's cute paw print mold.  I used black fondant and mixed in some tylose powder.  Tylose powder makes the fondant dry faster and harder.  I rarely use gumpaste anymore, and instead use fondant with tylose for modeling or making flowers.  Start with a small ball of the fondant/tylose and then press it into the mold.  It may take a few tries, but soon you'll figure out the right amount of fondant needed to fit perfectly in the pad or the toes.


If the fondant is not wanting to stay in the mold or is sticking to your fingers, dust on a little corn starch.


Press the fondant into the mold and continue with the rest of the paw prints.

Let the paw prints dry for an hour or so in the mold.  If you are in a hurry, you could put the mold in the freezer for 10 minutes.  When I was ready to flip them out, I put a cake circle on top, flipped it over and then carefully peeled back the mold.  Most of the prints came out easily, but I did have to  help a few of them out with a small paint brush.  I use a paint brush as opposed to a toothpick or fingernail (yikes!) so I won't leave a mark in the fondant prints.  


Make more prints, if needed.  The bottom tier of my cake was a 12" round and I used about 20 paw prints to go around the cake.  When you're ready to put them on your cake, first put a small dot of buttercream on the back.


Then using a toothpick or paintbrush, pick up the print by the buttercream dot and carefully place it on the cake.  


I loved having this mold for this cake.  I wanted all of the prints to be basically identical.  I'm afraid if I would have tried to model them by hand, they wouldn't have been so uniform in shape and size.  And it would have taken me FOREVER to make each one by hand because I'm such a perfectionist - I seriously could spend 20 minutes making one print!!!  The other thing I like about the mold is the raised or rounded dimension it gives the print.  Something I couldn't achieve with a Cricut or cutting a stencil by hand with an X-acto knife.  

This mold is very versatile.  You could use melted chocolate in a squeeze bottle or even isomalt.   It could also be used as a texture mat.  Above all - just HAVE FUN playing with your cake!


Guest post by Charla Tatom

Products Used:

Similar Item: 


Friday, May 11, 2012

First Communion Dessert Table

Check out the amazing display created by Jeannie Gearin using ribbon roses, crosses, cameo settings and a cameo.  

 When my niece  said she wanted "light blue" for her First Communion cake I was a little surprised.  Like, showers and baptism cakes, the colors for these occasions frequently fall along gender stereotypes, and pink is for girls. But, I was pleasantly surprised with how it all turned out.  
 The cake is  an eight inch round topped with a 5 inch round which gave enough room for the flowers.
The cameo setting mold turned out to be a nice frame for the monogram, some of the larger letters may not fit, but the "O" worked perfectly.
 When filling the cross mold I found the easiest method was to roll a log of 50/50 paste and press it down into the detailed areas. This amount of paste was enough to fill the whole mold. When removing the cross, ease out the bottom edge first and then the cross sides and then the top. I found I did not have any cracks using this technique.

 I used an impression mat on the fondant for the dress cookie cutter and added a few pearl dragees.

 The smallest of the ribbon rose mold set added a nice accent for the monogram cookies.
 A nice amount of candy and a nice amount of color!


The favor bags held a variety of candy cookies and white chocolate crosses.

Cream cheese mints are a traditional favorite at our family celebrations.

 Cream Cheese Mints
3 ounces cream cheese                        2 1/2 cups powdered sugar
1/4 teaspoon mint extract

Blend together until smooth. Roll into small balls the right size to fill molds. Roll in granulated sugar.
Press into molds. Refrigerate. Makes about 2 1/2 dozen mints


 Scallop cutters from the craft store make the cupcake picks easy and fast.

Cross Cookies using wilton purple cross cookie cutter.
Desserts and Party styling by Jeannie Gearin http://thepastrytip.blogspot.com/