Showing posts with label cake. Show all posts

Thursday, June 14, 2012

Pigs, Bacon and more!

Jeannie Gearin does it again with another amazing blog post.  This time it is a great idea for Father's Day!

Grilling and Father's Day just go together. Many men believe themselves
to be the King of  the Grill and that was behind the theme
for this cake and the matching cupcakes. And at the end of this
post, one more use for a pig mold.

For the board, I covered it with light brown 50/50 paste and then imprinted
the it with a wood grain impression mat. I took a ruler
and marked off wood plank lines. I used a mix of brown and black food
color with vodka and painted in the deepest areas to make them
stand out more. Then, to make it look like painted barn wood, I brushed the board with red dust. I  set aside to let it dry.
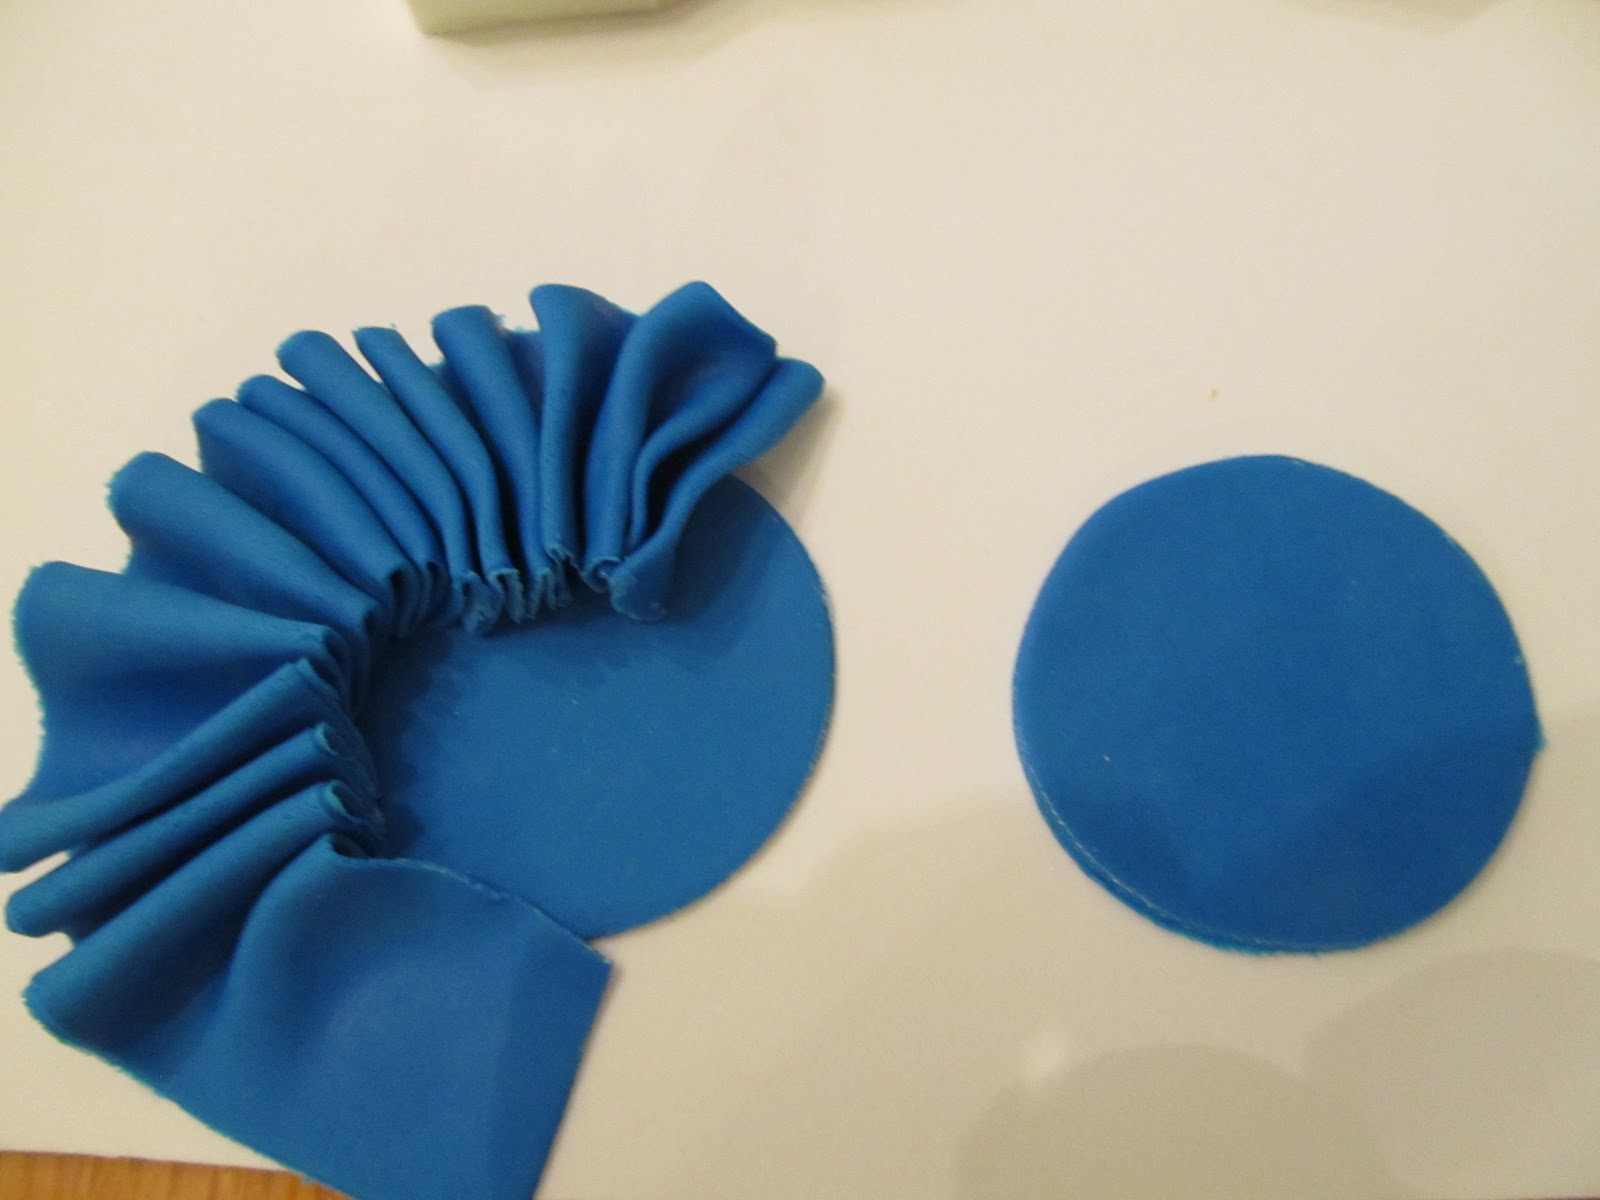
I made the ribbon by cutting a circle and letting it dry over night.
I used the ribbon cutter to cut a long one inch wide
strip and gathered the center up into folds. I attached it
to the circle with piping gel and let dry.


 The pig molds can be filled with one color gumpaste and
color brushed  on or with multiple colors. I used pink for the
 pig face and red for the bandana.
I always have better luck with chilling molds in the freezer
for a few minutes.Then, releasing them after letting it sit at
room temperature until it is not so cold and brittle.
I found the markers were easier to use than the paintbrush
for adding details. Mostly, I liked that it dried quicker,
but I am sure it is a matter of personal preference.
A little pink blush on the cheeks and inner ear gave the
pig face much more character.
 The two pigs together make a sweet pair.


These pigs are a nice size for cupcake decorating as well as
cake designs.
I made the banners using a clay letter embosser from the
craft store.
The rope border was made with a clay gun.
The fence was also done with the wood grain
impression mat. A toothpick is inside the fence posts
for support. This was a fun cake to make
and could be customized for several different
summer occasions.

Pigs =Bacon!

Maple Bacon Toffee
{with Chocolate Pigs}

I used my current favorite recipe for toffee which is
from the book Sweet Confections by Nina Wanat.
I added 1/2 teaspoon of maple extract.
After spreading the toffee out on a silpat and
 allowing it to cool, I spread 6 ounces of
semisweet chocolate on top and let chill.
Then, melt another 6 ounces of semisweet chocolate
 and spread that on the other side of the toffee.
While still warm, sprinkle about 2 slices of crispy, crumbled
bacon on top. Sprinkle 1/2 teaspoon fleur de sel to the
top of the toffee, working quickly before it cools.
Break into pieces and enjoy.

Any standard toffee recipe can be used.
Add to a bag with chocolate pigs and
tie with a bow for Father's Day gift, or
a summer hostess gift or...


Products Used:
For more amazing work from Jeannie, check out her blog, The Pastry Tip!

Friday, July 23, 2010

Fishy Fishy - Take Two

Glenda Stockwell created an asian themed cake using the koi fish mold.


I loved this mold the moment Melissa showed it to me!

To create the koi I used fondant mixed with tylose. I firmly pressed the fondant into the mold and smoothed over the back with the palm of my hand. The mold then went into the freezer for about 15-20 minutes -- one I forgot about and it was in for a good hour with no damage done. I then let the fish sit and dry for a few days - this step wasn't necessary but I was busy so they had to wait. I used the all-mighty google image search to look for koi coloring and then using everclear and petal dust I painted the designs on my koi. Then I used a pearl sheen airbrush color and lightly airbrushed each --- this didn't show up that great in the pics but I liked the look in person.

I marbled the fondant for the cake and board --didn't look as marbled on the cake as it was on the board. Then stenciled an asian symbol that should read "peace" according to the stencil manufacturer but according to my friend it is not peace and he's not sure what symbol it is. Bamboo looking fondant pieces form the border. The bamboo was dusted with browns and greens.

For the top of the cake I create a water lily looking flower. I didn't have cutters or veiner so I just kinda winged it.


I hope you enjoy using this mold and make sure to share your pics!

Glenda

Products Used:


Thursday, July 22, 2010

Timeless Classic Look


Check out the project that Katherine Dungan created using a brooch mold.


I chose this mold to work with as I had an upcoming birthday of some one who wanted a classic style cake.
It gave a very nice broach about 1 1/2" long. I wanted one that looked like a pearl set in gold. To accomplish this I put just enough white fondant/gumpaste mix to fill the center cavity. The next step was to brush it with a little glue. Taking a yellow fondant/gumpaste mix is finished filling the mold. I used the yellow so that when I painted it with gold dust, if I missed any spots, it would not be as obvious as it would if it were white.

The cake was a white 10" hex cake. The reason for the hex cake was to allow the broach to stand out. The topper was fresh flowers and I added small pleated drapes on the corners. I love how the mold turned out but wish I had used different flowers.


I think the broach added the timeless classic look I wanted.

Thank you so much for letting me part of the DTC product testing group.

Sincerely,
Katherine Dungan

Products Used:

Monday, July 19, 2010

It's a Garden Party!


Check out the project that Kim Bierbaum created using the 5-petal blossom veiner.


Attached are pictures of a cake using the five blossom veiner mold. The flowers are 50/50 gumpaste and fondant, but I also tried with chocolate clay, and they came out great too. I cut the fondant with a five petal cutter, put them in the mold and peeled them off. It was that easy - didn't have to put them in the freezer or anything. I let them dry on a flower former and added piped centers, dusted with luster dust. I had a little trouble getting them off the mold with the chocolate clay, so I stuck them in the freezer for a couple of minutes and they came right off. I had a great time with this mold, and made way more flowers than I needed just because it was fun to play with.

Thanks - Kim


Product Used:

Wednesday, June 30, 2010

Wedding Dress Corset Cake/TuTu Cake


Oh! this has to be one of my favorites - the Corset Lace.  When I found this lace I fell in love with it and knew it had to be made into a mold -- It has proven to be extremely popular and I love seeing the different projects using it.  I was so excited to add it to the list of test products for the Decorate the Cake Product User group and just love what Lori came up with for her project. 

Wedding Dress Corset Cake/TuTu Cake
by Lori Holbrook, DTC Product Test Group Member


My name is Lori Holbrook but I am also known as the Busy Bee Baker. I am a self-taught cake girl!!! I love to cook and after the birth of my first nephew my cake baking turned into cake decorating. That first cake prompted some of my friends to want cakes. After a move my cake orders had ceased until someone saw a picture on facebook of the last nephew’s 1st birthday cake and my business has taken off. I am also a full time special education teacher but I have a huge passion for cake art!!!! My business name is a celebration of the 3 nephews we call the Killer Bs…..all their names begin with me….so each B in Busy Bee Baker represents one of my nephews!!! You can check out my work on Facebook….search for Busy Bee Baker!!!!


This was a fun creation for me. I had been toying with the idea of a corset cake when I saw the corset mold. I used three different DTC products for this project. The Corset Wedding Cake then morphed itself into a Tutu cake. I had some batter left over from another cake order so I made one 4 in” layer and two 5” layers. I dirty iced all three with the 4” layer between the two 5” layers…to try and have a little bit of a curve so I wouldn’t have to sculpt. My cake was not of the sculpting texture….future cakes would be sculpted.


Once the layers were dirty iced and chilled, I rolled out white fondant and embossed with the feather swirls and draped the layers. Next I made the corset from the mold and attached to the cake to cover the back seam. I applied edible sugar pearls to the front of the cake and then made pleats and attached to the bottom of the cake and added a fondant rope to cover the seams. Then I draped white fondant around the top of cake and spiraling in to cover the top. Once I completed I got the idea to paint the corset with luster dust to show off detail in pictures….that is when I had the vision of a tutu cake…..I added a few fondant roses to the bottom of the corset and snapped some pictures.


Then I went back toke off the roping and rose buds and painted the bodice of the cake and the bottom pleating with pink luster dust. I added the roping back and thought the front needed something more so I added a fondant cut out of the DTC medallion and dusted it with luster dust and attached to the bottom of the cake........then made a pair of fondant ballet shoes to go atop the cake of to the side.


I think the corset added a neat detail that can be used for the front of back of cake.

Along with the corset mold, I used the Fancy Scroll finding mold and the Feather Swirls #2 Texture Mat shown below:


Here is the corset lace press

Here are the progression pictures and final results 


Products Used: