Showing posts with label log. Show all posts

Monday, June 9, 2014

Creating an Isomalt Pond


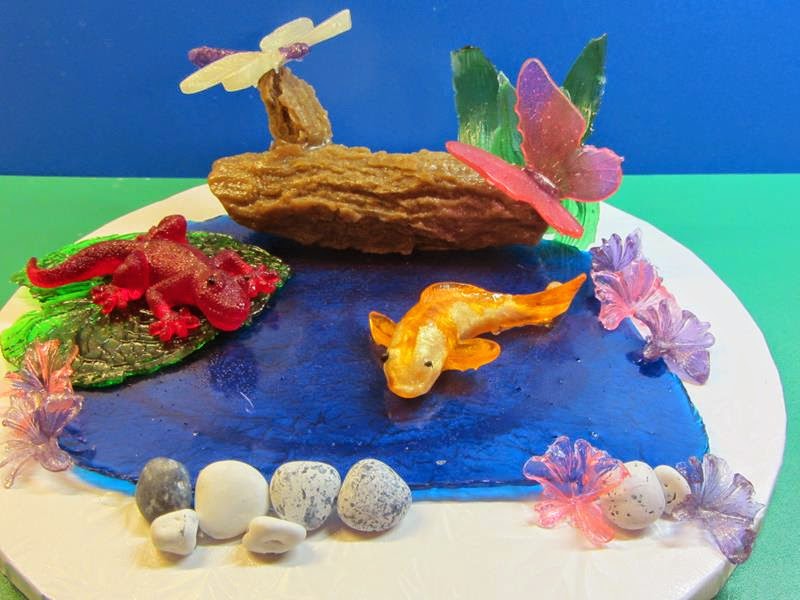
Today we will make the base pond and add the elements created in previous blog posts to get a great little pond scene.  

First use some aluminum foil, you will want to use a non-stick foil or if you do not have a non-stick foil use foil that you spray with cooking spray and then lightly wipe the excess off leaving a thin layer of spray.  

Wrinkle the foil up a bit, then smooth it back out.  The wrinkles add additional dimension to the back side of the isomalt.  Next manipulate the foil to build a dam to keep the isomalt contained when pouring out the pond.  Place the foil onto a silpat to help protect your workspace.


I used CakePlay Blue Isomalt Nibs, but you could use clear and add blue food coloring.  Place the nibs in a microwave safe container with a pour spout to melt, warming in 15-30 second increments until fully melted.  Stir with a bamboo skewer and let sit to allow bubbles to dissipate.  Then pour the isomalt onto your prepared foil.  Maybe you can aim better than I do and actually keep it all in the dam.  


You don't have to fill the entire area -- this is just a guide.


Once the isomalt is fully cooled gently pull the foil away from your pond.  


Invert onto a silpat and peel back the foil.


Place the pond the cake board or a cake top.  Using isomalt as your glue start adding in all of the elements created from out previous blog posts.

Dragonfly Directions
5 Petal Flower Directions

 Butterfly Directions


Log Directions


DTC Products Used:

Tuesday, May 6, 2014

Isomalt Log using Texture Mats


Today we are going to show you how to make a textured log for your next isomalt scene.

Remember when working with isomalt to take precautions against getting burned.  The sugar gets very hot!  Wear gloves and keep a bucket of ice water handy in the event you get sugar on you.

I'm going to use my Oak Tree Bark texture mat.  You could also use the  Pear Tree Bark texture mat.  For the first step I am going to pour the isomalt onto the back side of the mat.  You may use any smooth silicone mat or silpat type product for this step.


I used clear and white isomalt nibs from CakePlay.  They were melted in the microwave in 30 second increments until fully melted.  Then I added a few drops of brown food coloring until I reached the desired color; using a long bamboo skewer to stir the mixture.  

Pour out a portion of the isomalt onto the back of the mat.  Use a skewer to keep it from oozing off the sides.  


As it starts setting keep folding the mat over folding the sugar onto itself.  


Once the sugar forms together use your hand to roll the isomalt back and forth forming a log.  ** Remember to do what I say and not what I'm showing -- please wear a glove as the sugar may still be warm enough to burn. **


Continue rolling until you get a round log of the desired shape.  Times will vary depending on the amount of isomalt in your log.  The larger log below took almost 30 minutes to cool where the small one only took about 10.


Make sure they are solid and cold before you continue or the log will become misshaped on the next step.

Now heat up your brown isomalt again.  You will pour this onto the textured side of your bark mat.

Pour out an amount that is larger than your log.  Use the skewer to flip the extended ends back over itself as they start to cool.  Allow this to set until it is firm but still slightly soft.  Bend the mold, if it cracks it is too cool, you may use a blow torch to soften the top surface.

Once softened, place the log onto the middle of the area.  Fold the mat over the log.


Roll the texture mat around the log center.  I then used rubber bands to hold in place.


Allow to cool for at least 30 minutes.....


DTC Products Used:
Oak Tree Bark Large Texture Mat
Pear Tree Bark Texture Mat

CakePlay Products Used:
Clear Isomalt Nibs
White Isomalt Nibs