Thursday, August 15, 2013

Of Corset's Lace!


My neighbor asked me to make her a corset cake for a bachelorette party.  Of course, I thought this was the perfect opportunity to use two of DTC's newest lace molds.

What you will need - some fondant (or gumpaste or 50/50 or medium of your choice), a palette knife, rolling pin and lace mold.  You can use pasta roller if you wish but since I didn't have much to do I just rolled mine out.


When I rolled out the fondant I made sure it was large enough by laying the insert on top of my rolled piece.


Next lay the fondant on top of the mold and place the lace insert piece on top.  I then apply gentle pressure tot he back side with one hand as I remove the excess fondant with my palette knife. This step going pretty quick.


Next I removed the lace insert piece and clean up my edges while it is still in the mold cavity.  Once cleaned up you may wish to back it with the insert one more time and apply gentle pressure.


Then flip the mold over and gently begin to roll back the mold off the fondant lace piece.  I held the fondant down with the one hand will removing the mold with the other.


You may then use the palette knife to do any additional clean up you need.  With this piece I didn't need much.

Of course before placing on your cake you must play with the lace a bit and make fun designs.  


I used a just a swipe of water to attach the lace to my cake.  Here are a few close ups of the lace designs.

Using the Italian Lace Floral mold and the light purple fondant I created the lace design down the middle of the corset.

Full lace piece

Showing sections that I cut apart.

Then I turned the cut sections and over lapped them on the cake.


DTC Products Used:


Tuesday, July 30, 2013

All Geared Up!

A BIG thank you to Amber Brooks for helping us out with this blog post.  


Amber first lightly dusted her molds with cornstarch.  


Start with a small amount of 50/50 (this was 50% fondant 50% gumpaste mixture) and place over the mold.  Amber used 50/50 but you may use straight fondant, gumpaste, modeling chocolate, isomalt or various combinations of sugar mediums.   


Then using a rolling pin roll out the 50/50 making sure to get the entire cavity filled.


Use a knife to cut away the excess 50/50.  Be careful around your fingers.  


Gently pull back the 50/50 as you are cutting.


Once removed clean up the back surface pressing any stray 50/50 back into the cavity and cleaning the edge.  


Depending on the medium used -- at this point you may wish to place the mold in the freezer for a few minutes to set the item which helps to avoid distortion when removing from the mold cavity.

Invert and flex the mold to remove the gear.  If using chocolate be careful on the flexing to avoid breakage. 


Tap the gear back into shape!


You can use the same application of molds for many different looks.  


DTC Products Used:

For more mold options for a gear/steampuck look check out our Mechanical Section of molds!  Click here

Check out more of Amber's cakes on her website!  Sweet Arts Creations, LLC

Monday, July 22, 2013

Merry Christmas....in July!

A big Thank You to Rebecca and Roslynne for helping out with this blog post.  Definitely a group effort!


To make the jingle bells we use used our mini jingle bell mold, some little balls of fondant, an edible food marker (not shown) and silver luster dust of choice.  


We formed the fondant into almost tic-tac shapes which easily slipped into the mold cavity.

Firmly press the fondant into the cavity.


Use a palette knife to clean up the excess fondant.

At this point place the mold into the freezer for about 10 minutes -- or longer if you are forgetful like I am!


Flex the mold and pop out the jingle bells.

Finished jingle bells. 
 We used a black food marker to mark the lines then brushed the jingle bell with the silver luster dust.


On the left is the fondant bell, middle with just the black line drawn and right dusted with silver.

Close up of the finished jingle bells.

Close up of a snowflake we added.  This was lightly dusted with a silver pearl dust. 

DTC Products Used:
Small Jingle Bell
Small Snowflake

Optionally Larger Jingle Bell
Large Jingle Bell

Friday, July 12, 2013

I've Been Framed!

Need a way to sparkle up a frame?  Check out the new shimmer isomalt options from Cake Play!


First we gathered our supplies -- we used the new
* pearl isomalt
* bronze isomalt
* silicone cups
* Pearl Frame mold


Melt your isomalt in the microwave in 30 second intervals until melted.  Some microwaves will take longer and other less time - so watch it carefully so you don't burn it.

Love the way the shimmers look when melted.

Very carefully pinch the sides of the silicone cup to create a pour spout.  Then pour a small dollop into each of the pearl cavities.  Don't worry if you get a little drop outside of the pearl - once slightly set you can use a toothpick to snatch that out.


Here I am getting some stray bits of isomalt out of the cavity with a toothpick.
Wait until the pearl color has set slightly so they don't blend.  Pour the bronze evenly over the back of the pearl.

Yes! That is my Icing Smiles shirt I'm wearing!

All pretty and swirly!

Allow the isomalt to fully cool.  Then gently turn the mold over and release the frame.


Ours came right out!  If it needs some coaxing make sure the isomalt is cool.  If it is cool then you can use a toothpick to encourage it to release.

Love the sparkle!

DTC Products Used:
Pearl Frame mold

Get your own Icing Smiles Shirt!

Tuesday, May 21, 2013

Whooo is using isomalt?

Quick shot we took playing with some isomalt in one of the new owl molds.

We use yellow and red CakePlay isomalt.  Melted in a few seconds in the microwave and poured directly in the mold.  We weren't terribly careful on pouring so it slid around in the cavity but you get the idea!


After unmolding......


Product Used:
Owl - Large Jeweled


Tuesday, March 26, 2013

Bling Bases are Affordable!

Sandy Swart does a beautiful job showing us a quick, easy and affordable way to make your bling bases!

Silver and Gold plateaus are beautiful and work great for that finishing touch for wedding cake presentations. 

Many of us do not have the funds or the storage space to purchase and store beautiful metal bases for our brides.

Here is one way to make a bling base to show off a wedding cake.  These are just general guidelines since you can make your base any size you want to.

Materials needed:

* Cake dummy with straight sides- can be purchased or I make my dummies out of 2" polystyrene house insulation that can be purchased in 4'x8' sheets at home improvement store.  I cut rounds, squares, ovals, or whatever shape need with a jigsaw and cover with contact paper.
* Florist foil
* Scissors
* Ruler or measuring tape
* Regular straight pins used for sewing
* Clear corsage pins (because they are fairly inconspicuous when pinning bling ribbon
* Bling ribbon available from Decorate the Cake


1.  Cover the top of the dummy with foil.  I rough cut the foil to cover the top by cutting the circle a little larger than the dummy layer so I can fold it over the edges and attach it every 3"-5" to hold it in place.  I want a temporary cover so I can use the same dummy and change the foil/bling ribbon cover and also easy to replace if top foil gets damaged at the reception when the cake is served.  You could tape it , but I used plain straight pins (what can I say-- I'm also a seamstress!)

2. Cover the sides of the dummy.  I measured then cut a strip of foil a couple of inches wider than the depth of the dummy.  Then I folded each edge under 1" to make finished look to the edging.  I secured this to the dummy with straight pins with the strips overlapping. .  In this picture you can see I did part with florist foil and part with regular aluminum foil to see if there was any difference in the look with the bling ribbon over it.


3. Measure circumference of dummy and cut bling ribbon that length plus 1".  Measure the height of the dummy and cut the bling to that width.  My dummy was 4" deep so I cut my bling so that it was 4" wide.  Place the bling ribbon around the dummy and over lap the ribbon in the back and secure with at least 3 crystal headed corsage pins in the back for a 4" ribbon.  Since it is a foam dummy it is easy to pin the ribbon in place.  It is secure and not that noticeable.


4a. After it was covered with the bling ribbon, I couldn't tell any noticeable difference between the foil and the aluminum foil behind the ribbon on the sides. 


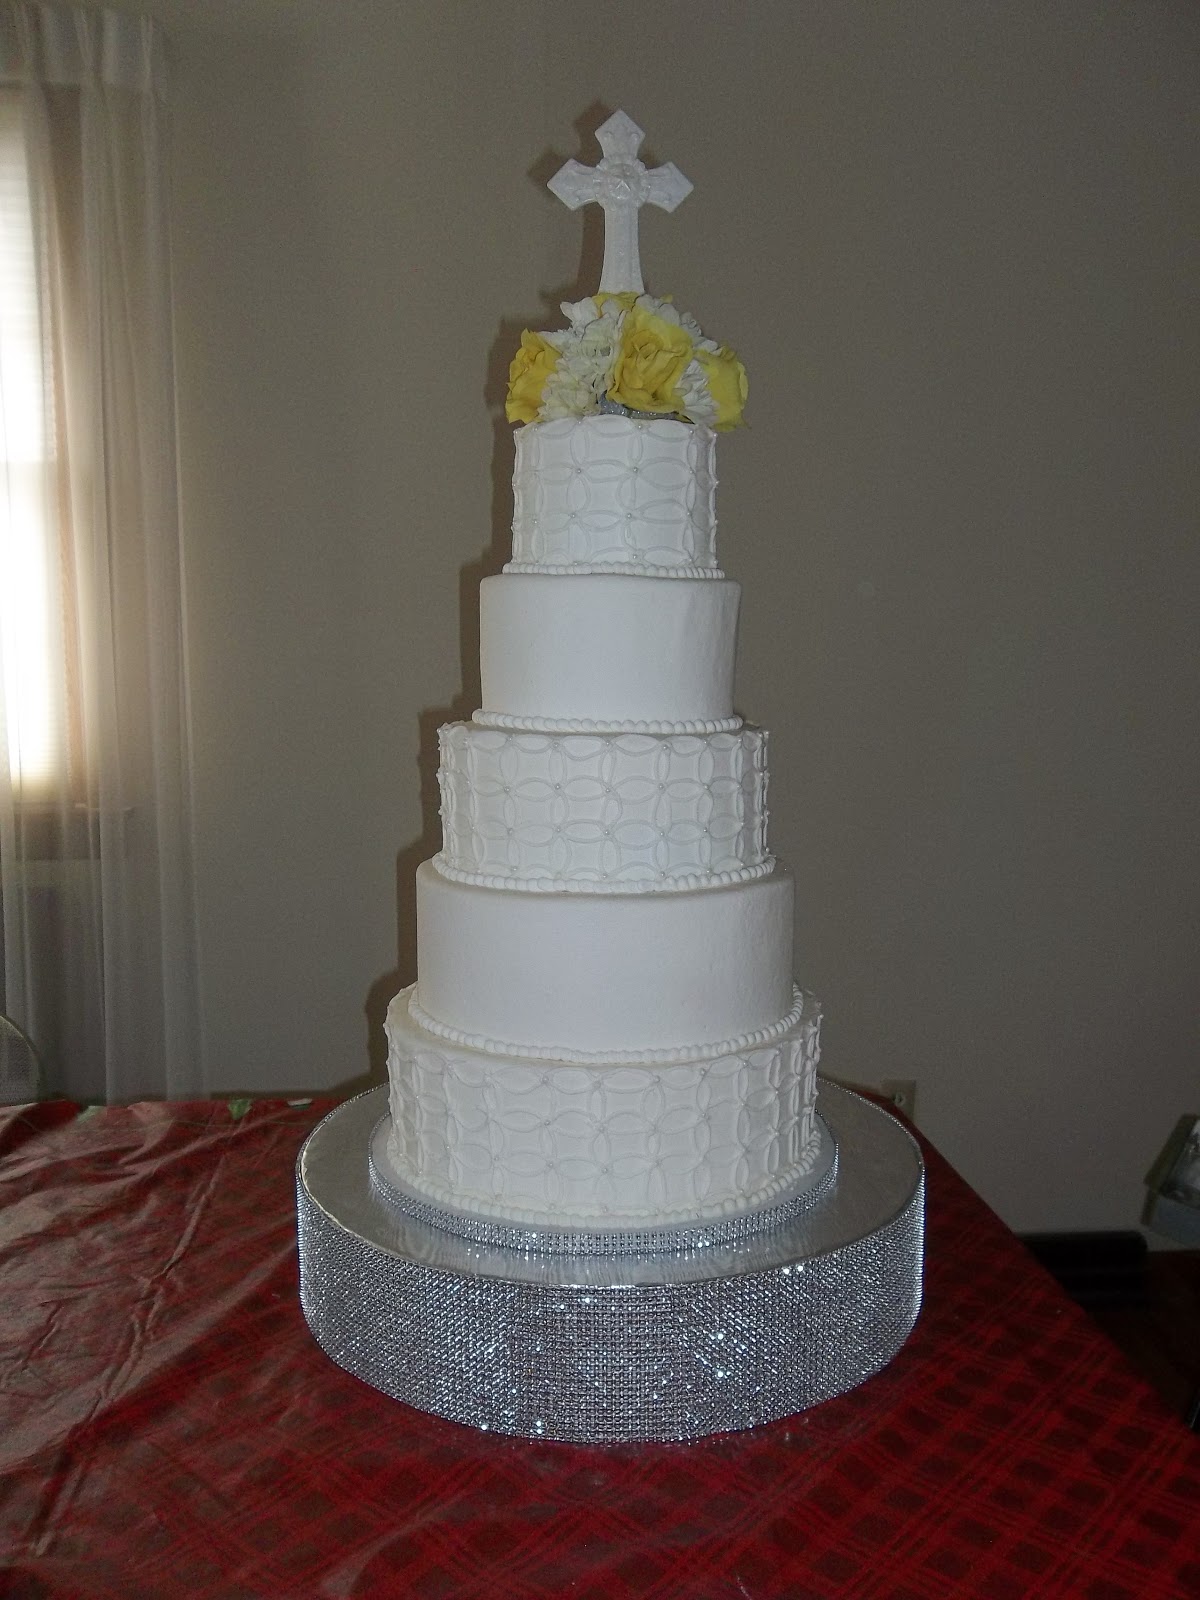
4b. Finished bling base with cake.  You can also bling the cake board.  Here 1/2" wide strip of bling ribbons was wrapped around the edge of the cake board.


NOTE: An alternative to a round cake dummy might be a stack of cake pad circles.

Any questions?  You can contact me through Sandy Swart Cakes on Facebook or at sewsweet2@hotmail.com
Albums of my decorated cakes can be seen at:  http://flickr.com/photos/sewsweet2/sets

Products Used:
Silver Bling Ribbon

Other colors available:
Apple Green Bling Ribbon
Gold Bling Ribbon
Pink Bling Ribbon
Purple Bling Ribbon
Red Bling Ribbon
Silver/Black Bling Ribbon
Turquoise Bling Ribbon